GST Return Filing
Manual > Form GSTR-1 > Creation and Submission of Statement of Outward Supplies
How can I create, submit and file details for the outward supplies in Form GSTR-1 (Monthly/Quarterly)?
To create, submit and file details for outward supplies in Form GSTR-1, perform following steps:
A. Login and Navigate to Form GSTR-1
B. Generate Form GSTR-1 Summary
C. Download Details from E-Invoice
E. Viewing or Editing E-invoice Details in Form GSTR-1
F. Deleting Details in Form GSTR-1
I. File Form GSTR-1 with DSC/ EVC
A. Login and Navigate to Form GSTR-1
1. Access the www.gst.gov.in URL. The GST Home page is displayed. Login to the GST Portal with valid credentials. Click the Services > Returns > Returns Dashboard option.

2. The File Returns page is displayed. Select the Financial Year, Quarter and Period (Month) for which you want to file the return from the drop-down list. Click the SEARCH button.
3. In the GSTR1 tile, click the PREPARE ONLINE button if you want to prepare the return by making entries on the GST Portal.
Note:
- You can click the PREPARE OFFLINE button to upload the JSON file containing invoice details and other Form GSTR-1 details prepared through the offline tools.
If you are Micro, Small or MSME and wish to submit your interest for availing Mudra Loan upto 10 Lacs or MSME Loan upto 5 Cr., you can click on the hyperlink of click here.

- Fill the consent form and click on the SUBMIT button to share the details with Department of Financial Services.

- Following Message will be displayed. Click on CLOSE button to go back to Returns dashboard.

4. The GSTR-1 – Details of outward supplies of goods or services page is displayed.
Note: You can click the HELP button to view help related to this page.

Click here to go back to main menu
B. Generate Form GSTR-1 Summary
5. Scroll down to the bottom of the GSTR-1 – Details of outward supplies of goods or services page and click the GENERATE GSTR1 SUMMARY button to generate summary of recent records.

6. After the summary generation is initiated, you will notice the message to click on refresh button to check for completion of request.
Note: Summary generation can be initiated after 5 mins of completion of previous request as GENERATE GSTR1 SUMMARY button will be disabled for 5 mins.

Click here to go back to main menu
C. Download Details from E-Invoice
Downloading details from E-invoice reduces the burden of taxpayers to again upload details of outward supplies in their Form GSTR-1. With the auto-populated details, taxpayers can use it to file their Form GSTR-1 easily.
After generating invoices, the taxpayers will upload the invoice details on Invoice Registration Portal (IRP), which in turn will generate a unique invoice reference number (IRN), a QR code and digitally sign it. The GST Portal will get these E-invoice details from IRP and update it in the taxpayer’s Form GSTR-1 in a period of 2 days.
The data gets auto-populated from E-invoices in the following tables of Form GSTR-1:
a. 4A, 4B, 4C, 6B, 6C – B2B Invoices
b. 6A – Export Invoices
c. 9B – Credit/Debit notes (Registered) - CDNR
d. 9B – Credit/Debit notes (Unregistered) - CDNUR
7. To download details from e-invoice, click the DOWNLOAD DETAILS FROM E-INVOICES (EXCEL) button.

8. Clicking the button downloads the file in an excel format.
Note:
In case the number of records available are less than 500, then the excel gets downloaded instantly and in-progress message will not be displayed. The excel will get downloaded instantly.
If the records are more than 500, the downloaded file will appear under the ‘E-invoice Download History” section and below progress screen will be shown.

In case there are no records or zero records available to be downloaded, then the following information message will be displayed on the screen.

9. Click the E-INVOICE DOWNLOAD HISTORY button to view the downloaded excel files.

10. The E-invoice Details section provides the last five downloaded e-invoice excel files by the users, with date and time stamp. Click the Click here to download – File1 link to download the excel file .

11. The file gets saved in the local drive of your machine. The link for the downloaded excel file is displayed at the bottom of the page.

12. Click the file icon to open the folder on your local machine.

13. The excel file is displayed.

Note: The E-invoice details that are auto-populated from invoices for Form GSTR-1 are displayed in excel. The details of various tables are displayed in different sheets, which can be accessed by clicking the tabs available at the bottom of the sheet.
Click here to go back to main menu
D. Creating My Masters
You can create Master list of Products and Supplier / Recipient that can be used for preparation of GSTR-1 online and offline. To create Masters, perform the following steps:
14. Login to the GST Portal with valid credentials. Click the Services > User Services > My Masters option.

15.1. My Masters page is displayed. Following four tabs will be available on the page:
| S. No. | Name of the Tab | Nature of the Tab |
| 1 | Product Master | Taxpayer can use this tab to prepare and view a product master list which can be used while preparing GSTR-1 for filing. |
| 2 | Supplier / Recipient Master | Taxpayer can use this tab to prepare and view supplier / recipient master list which can be used while preparing GSTR-1 for filing. |
| 3 | Download my Master(s) | Taxpayer can use this tab to download the master lists prepared online from the Portal. |
| 4 | Upload my Master(s)(Prepared Offline) | Taxpayer can use this tab to upload master lists, prepared offline, on the Portal.. |

1. Product Master - Taxpayer can use this tab to prepare and view a product master list which can be used while preparing GSTR-1 for filing.

1.1 Enter HSN Code by selecting from generated list of codes and HSN description will be auto-populated, enter a unique Product name for your product, select IGST rate(%) and UQC from the drop-down list. Click the SAVE button.
Note: You can give a unique name to a product as per your convenience. You can click the ADD button to add all records at once and then click the SAVE button to save the list.

1.2 ADDED PRODUCT(S) table will be updated. Click Records per page drop-down to change the number of records visible.
Note:
• You can add up to 500 records, post which new records can only be added after the deletion of previous records.
• You can edit the list or DELETE product from the list by clicking on respective buttons.
• You can use Search field to find product details in the master list.

• You can click the SUMMARY button to check the no. of records basis Tax Rate.

2. Supplier / Recipient Master - Taxpayer can use this tab to prepare and view supplier / recipient master list which can be used while preparing GSTR-1 for filing.

2.1 Enter details in GSTIN field and Trade/Legal Name will be auto-populated, enter a unique Supplier / Recipient name, and check the box for Recipient or Supplier to specify the category. Click the SAVE button.
Note:
• You can categorize GSTIN as both the recipient and supplier.
• You can click the ADD button to add all records at once and then click the SAVE button to save the list.

2.2 ADDED SUPPLIER(S) / RECIPIENT(S) table will be updated. Supplier/Recipient details like Registration status, Type of taxpayer will be auto-populated. Click Records per page drop-down to change the number of records visible.

Note:
• You can add up to 500 records, post which new records can only be added after the deletion of previous records.
• Alternatively, you can add records in supplier/recipient master directly while filing GSTR-1. While entering new product details, click the ADD TO MASTER button.

• You can edit the list or DELETE product from the list by clicking on respective buttons.
• You can use Search field to find GSTIN details in the master list.
• You can click the SUMMARY button to check the no. of records basis Category of GSTIN.

3. Download my Master(s) - Taxpayer can use this tab to download the prepared master lists to their system.

3.1 Click Download My Master as Excel to download the list in excel format.


3.2 Click Download My Master JSON for Offline Tool to download the master list in JSON format for viewing in offline tool.


4. Upload my Master(s)(Prepared Offline) - Taxpayer can use this tab to upload master lists prepared in GST offline tool.

4.1 To prepare Masters offline, open GST Offline Tool and click the PREPARE/VIEW button under My Masters tab.

4.2 GSTIN will be auto-populated from the file. Click the PROCEED button.

4.3 My Masters page will be displayed. Enter details in Product Master and Supplier/Recipient Master by following the similar process as of online facility.
For Product Master: Enter HSN Code by selecting from generated list of codes and HSN description will be auto-populated, enter a unique Product name for your product, select IGST rate(%) and UQC from the drop-down list. Click the SAVE button.

For Supplier/Recipient Master: Enter details in GSTIN field and Trade/Legal Name will be auto-populated, enter a unique Supplier/Recipient Name, and check the box for Recipient or Supplier to specify the category. Click the SAVE button.

Note:
• You can click the ADD button to add all records at once and then click the SAVE button to save the list.
• You can edit the list by clicking on the edit button.
• Click the REMOVE DATA IN SELECTED TABLES button to remove records added in offline tool.

• Click the MARK FOR DELETE IN SELECTED TABLES button to mark records for deletion that were added on online portal and uploaded by JSON to offline tool. These records cannot be deleted in offline tool.

4.4 Click the GENERATE JSON FILE TO UPLOAD button to generate the list in JSON format.

4.5 Login to online portal and navigate to Services > User Services > My Master > Upload my Master(s)(Prepared Offline). Click Upload My Master JSON from Offline Tool to upload the master list prepared on GST Offline Tool.

4.6 Uploaded Master Records are displayed.

Note:
• In case there are errors in the processed records uploaded from offline prepared JSON, they will be displayed in separate categories of drop-downs and can be corrected with the edit buttons.
• Also, offline prepared data cannot be uploaded in the online tool and similarly online prepared data cannot be uploaded in the offline tool.

Click here to go back to main menu
E. Viewing or Editing E-invoice Details in Form GSTR-1
16. To edit the e-invoice details that get auto-populated in Form GSTR-1, perform following steps:
Note: The data gets auto-populated from E-invoice in the following tables:
- 4A, 4B, 4C, 6B, 6C – B2B Invoices,
- 6A – Export Invoices, and
- 9B – Credit/Debit notes (Registered) - CDNR
- 9B – Credit/Debit notes (Unregistered) – CDNUR
(Note: For illustration purpose, the 4A, 4B, 4C, 6B, 6C – B2B Invoices tile has been considered. You can click any of the above-mentioned tiles to edit the details.)
16.1 Click the 4A, 4B, 4C, 6B, 6C – B2B Invoices tile to edit the details.

16.2. Click the hyperlink on Processed Records to open the list of processed invoices of recipient GSTIN.

16.3. The list of invoices received from the selected GSTIN is displayed. To view all the columns, click the Display/ Hide Columns drop-down arrow, and then select Check All option from the list. You can also change Records per page by clicking on the drop-down to view up to 50 records at once.
16.4. The following columns gets displayed as a part of auto-population of data from Form GSTR-1.
Note:
By default, the IRN and IRN Date columns are hidden. To view the columns, select the Check All option from the column drop-down.
In case the E-invoice details are auto-populated from Form GSTR-1, the following details can be viewed in the Processed Documents page:
Source: Displays the source from where the details are uploaded in GSTR-1. ‘E-invoice’ implies that the details are auto-populated from E-invoice
IRN: Invoice Reference Number (IRN) of the E-invoice
IRN Date: Date of E-invoice
16.5. To edit an invoice details, click the edit icon under Actions column. The invoice is displayed.
16.6. Click the EDIT button and make changes/ edit the invoice details wherever required and then click the SAVE button.
Note: Once the e-invoice details that are auto-populated from Form GSTR-1 gets edited, the source is no longer E-invoice and the three columns: Source, IRN, and IRN Date become blank.

16.7. Clicking the SAVE button displays an error message. Click the YES button to close the message window.

Note: In case of deleting the record, a warning message will be displayed. Click on YES button to close the message window.
16.8. The following success message is displayed at the top of the page indicating the request has been successfully accepted. Add Invoice page will reopen once you save the record. You may continue adding new records using this form or click Back icon/button to go back to Recipient wise count tab.

Click here to go back to main menu
F. Deleting Details in Form GSTR-1
Note: To delete details in Form GSTR-1, you can
Either go to individual tables and delete details within the tile using the DELETE button or

Click RESET button to delete details of all tiles at one go.

Click here to go back to main menu
G. Enter Details in various tiles
17. There are number of tiles representing Tables to enter relevant details. Click on the tile names to know and enter related details:
Table 4A, 4B, 6B, 6C - B2B Invoices: To add an invoice for taxable outwards supplies to a registered person
Table 5A, 5B - B2C (Large) Invoices: To add an invoice for taxable outwards supplies to a consumer, where place of supply is other than the State where supplier is located (Inter-state supplies) and invoice value is more than Rs. 2.5 lakh
Table 6A - Exports Invoices: To add an invoice for supplies exported
Table 7- B2C Others: To add consolidated details of taxable outwards supplies to a customer where invoice value is less than Rs. 2.5 lakh and all intra state supplies to unregistered customers
Table 8A, 8B, 8C, 8D - Nil Rated Supplies: Nil Rated Supplies: To add consolidated details of nil rated, exempted and Non-GST Outward supplies
Table 9B - Credit / Debit Notes (Registered): To add details of credit or debit notes issued to the registered recipients
Table 9B - Credit / Debit Notes (Unregistered): To add details of credit, debit notes issued to the unregistered recipients
Table 11A(1), 11A(2) - Tax Liability (Advances Received): Tax Liability (Advances Received): To add details of transactions attracting tax liability arising on account of Time of Supply (like receipt of advances)
Table 11B(1), 11B(2) - Adjustment of Advances: To add the advance amount received in earlier tax period and adjusted against the supplies being shown in this tax period
- Table 12 - HSN-wise-summary of outward supplies: To furnish the summarized details of all outward supplies HSN and rate wise along with quantitative details.
Table 13 - Documents Issued: To add the details of documents issued during the tax period
Table 9A - Amended B2B Invoice: To make amendments to details of outward supplies to a registered person of earlier tax periods
Table 9A - Amended B2C (Large) Invoice: To make amendments to taxable outward supplies to an unregistered person of earlier tax periods
Table 9A - Amended Exports Invoices: To make amendments to supplies exported
Table 9C - Amended Credit/ Debit Notes (Registered): To make amendments to details of credit or debit notes issued to the registered recipients of earlier tax periods
Table 9C - Amended Credit/ Debit Notes (Unregistered): To make amendments to details of credit or debit notes issued to the unregistered recipients of earlier tax periods
Table 10 - Amended B2C (Others): To make amendments to details of B2C of earlier tax periods
Table 11A - Amended Tax Liability (Advance Received): Consolidated statement for amendments of information furnished in earlier tax period
Table 11B - Amended of Adjustment of Advances: Consolidated statement for amendments of information furnished in earlier tax period
For all tables, records are indicated by following:
Processed records – Marked in Green

Errored records – Marked in Red

Pending – Marked with Processing Symbol
Table 4A, 4B, 4C, 6B, 6C - B2B Invoices
To add an invoice for taxable outwards supplies to a registered person, perform the following steps:
17.1.1 Click the 4A, 4B, 6B, 6C - B2B Invoices tile to enter the invoice details for B2B transactions (goods/ services sold to a registered taxpayer).
B2B Invoices will have following 3 tabs:
• Recipient wise count- This tab displays details of records added by tax payer including hyperlinked counts of Processed and Pending/Errored Records.
• Document wise details- After clicking the hyperlink on the count of processed records, document wise details tab will open. This tab displays the details of processed records (invoices) of a particular recipient added by the taxpayer.
• Pending/Errored Records- After clicking the hyperlink on the count of pending/errored records, Pending/Errored records tab will open. This tab displays the details of pending/errored records (invoices) of a particular recipient added by the taxpayer.

17.1.2 The B2B Invoices- Recipient wise count tab is displayed. Click the ADD RECORD button to add a new invoice for any recipient.
Note:
• Details of all records added by taxpayer like Recipient Details, Trade/Legal Name, Taxpayer Type, Processed Records and Pending/Errored Invoices will be displayed in the Record Details table.
• You can import the data from e-Way Bill (EWB) System by clicking on the IMPORT EWB DATA button. To view step-by-step instructions on how to do this, click here.

17.1.3 The B2B – Add Invoice page is displayed. In the Receiver GSTIN/UIN field, enter the GSTIN or UIN of the receiver.
17.1.4 Select the checkbox for Deemed Exports or SEZ Supplies with payment or SEZ supplies without payment as applicable. Select the Supply attract Reverse Charge checkbox, in case supply made to the taxpayer is covered under the reverse charge mechanism. Select the checkbox provided Is the supply eligible to be taxed at a differential percentage (%) of the existing rate of tax, as notified by the Government?, in case supply is eligible to be taxed at a differential percentage of the existing rate of tax.
Note: Deemed export details can be provided for payment of IGST, CGST and SGST payments.
17.1.5 In the Invoice No., Invoice Date and Total Invoice Value fields, enter the Invoice number, date of the invoice and value of the total invoice.
Note:
The GSTIN should be registered on the date of invoice.
Once the GSTIN of the receiver is entered, Receiver Name, POS and Supply Type fields are auto-populated based on the GSTIN of the receiver.
The auto-populated POS is editable. Depending on selected POS, the supply type gets auto-populated.
The screen will expand downwards and more fields will appear to enter line item details of the invoice.
In case of UN Bodies, Embassies, Government Offices or Other Notified persons, you need to provide Unique Identification Number (UIN) of the receiver.
An invoice number should be alphanumeric with allowable special characters and unique for a given Financial Year (FY).
Invoice date cannot be a future date or a date prior to the date of registering with GST.
17.1.5 (a) In case of Intra-State transaction: In case the POS (place of supply) of the goods/ services is the same state as that of the supplier, the transaction is an Intra-State transaction. Notice, fields for Central Tax and State/UT Tax will appear. In the Taxable Value field against the rates, enter the taxable value of the goods or services. In the Cess field, enter the cess amount.
Note: The Amount of Tax fields are auto-populated based on the values entered in Taxable Value fields respectively. However, the taxpayer can edit the tax amount.
Note: Intra-State supplies attracting IGST will be enabled only when the supply attract reverse charge is selected by the taxpayer.

17.1.5 (b) In case of Inter-State transaction: In case the POS (place of supply) of the goods/ services is the different from the state of the supplier, the transaction is an Inter-State transaction. Notice, field for Integrated Tax will appear. In the Taxable Value field against the rates, enter the taxable value of the goods or services. In the Cess field, enter the cess amount.
Note: The Amount of Tax fields are auto-populated based on the values entered in Taxable Value fields respectively. However, the taxpayer can edit the tax amount.
17.1.6. Click the SAVE button to save the invoice details.

Note: Add Invoice page will reopen once you save the record. You may continue adding new records using this form or click Back icon/button to go back to Recipient wise count tab.

17.1.7. You will be directed to the previous page. You can add invoice of the particular receiver by clicking on the green button in the Add Invoice column. Click the BACK button to go back to the Form GSTR 1.

17.1.8. Click on hyperlink of Processed Records to edit processed records in Document wise details tab.
![]()
17.1.9. Document wise details tab is displayed. Details of processed records added by taxpayer like recipient details, legal name and invoice details will be displayed. Click the BACK button to go to Recipient wise count page.
Note:
Click on Records Per Page drop-down to view up to 50 records per page.
You can also search for a particular invoice using the Search field.

Note: Follow similar steps to access Pending/Errored Records by clicking the hyperlink on pending/errored records column.

17.1.11. You will be directed to the GSTR-1 landing page and the B2B Invoices tile in Form GSTR-1 will reflect the number of processed and errored invoices added.
Note: If there are invoices processed with error, the table will be marked in red.

Click here to go back to main menu
Table 5A, 5B - B2C (Large) Invoices
To add an invoice for taxable outwards supplies to a consumer, where place of supply is other than the State where supplier is located (Inter-state supplies) and invoice value is more than Rs. 2.5 lakh, perform the following steps:
17.2.1 Click the 5A, 5B - B2C (Large) Invoices tile to enter the invoice details for inter-state taxable outward supplies made to a consumer of value greater than 2.5 lacs.

17.2.2. The B2C (Large) Invoices – Summary page is displayed. Click the ADD RECORD button to add a new invoice for any receiver.
Note: You can import the data from e-Way Bill (EWB) System by clicking on the IMPORT EWB DATA button. To view step-by-step instructions on how to do this, click here.

17.2.3. The B2C (Large) Invoices – Details page is displayed. In the POS field, select the place of supply (state code) where the supplies were delivered.
17.2.4. In the Invoice No. field, enter the Invoice number issued to the consumer of that POS.
Note: An invoice number should be alphanumeric with allowable special characters and unique for a given Financial Year (FY).
17.2.5. In the Invoice Date field, enter the date on which the invoice was generated.
17.2.6. In the Total Invoice Value field, enter the total amount for which the goods or services are supplied.
17.2.7. Select the checkbox provided Is the supply eligible to be taxed at a differential percentage (%) of the existing rate of tax, as notified by the Government?, in case supply is eligible to be taxed at a differential percentage of the existing rate of tax.
17.2.8. In the Taxable Value field against the rates, enter the taxable value of the goods or services. In the Cess field, enter the cess amount.
Note: The Amount of Tax fields are auto-populated based on the values entered in Taxable Value fields respectively. However, the taxpayer can edit the tax amount.
17.2.9. Click the SAVE button to save the invoice details.

Note: Add Invoice page will reopen once you save the record. You may continue adding new records using this form or click Back icon/button to go back to Processed Records page.
17.2.10. Click the BACK button to go back to the Processed Records page.
Note:
The status of the added invoice is Processed.
Here, you can also edit/delete the added invoices (under Actions).

17.2.11. Click on the back button to go to GSTR-1 landing page and the B2C (large) Invoices tile in Form GSTR-1 will reflect the number of invoices added.

Click here to go back to main menu
Table 6A - Exports Invoices
To add an invoice for supplies exported, perform the following steps:
17.3.1. Click the 6A- Export Invoices tile to enter the invoice details for supplies exported.

17.3.2. Click OK.

17.3.3. The Exports – Invoices Summary page is displayed. Click the ADD DETAILS to add a new invoice.
Note: You can import the data from e-Way Bill (EWB) System by clicking on the IMPORT EWB DATA button. To view step-by-step instructions on how to do this, click here.

17.3.4. The Exports – Add Details page is displayed. In the Invoice No. field, enter the Invoice number issued against exports sales.
17.3.5. In the Invoice Date field, enter the date on which the invoice was generated.
17.3.6. In the Port Code field, enter the port code.
17.3.7. In the Shipping Bill No./Bill of Export No. field, enter the unique number of the shipping bill with location code generated while shipping.
Note: Shipping Bill No./Bill of Export No. should be minimum 3 and maximum 15 digit numeric.
17.3.8. In the Shipping Bill Date/ Bill of Export Date field, enter the date on which the shipping bill was issued.
17.3.9. In the Total Invoice Value field, enter the total amount of all the goods or services supplied.
17.3.10. From the GST Payment drop-down list, select whether the GST is paid against the invoice or not.
17.3.11. In the Taxable Value field against the rates, enter the taxable value of the goods or services.
Note: The Amount of Tax fields are auto-populated based on the values entered in Taxable Value fields respectively. However, the taxpayer can edit the tax amount.
17.3.12. Click the SAVE button to save the details.

Note: Add Invoice page will reopen once you save the record. You may continue adding new records using this form or click Back icon/button to go back to Processed Records page.
17.3.13. Click OK.

17.3.14. Click the BACK button to go back to the Processed Records page.
Note:
The status of the added invoice is Processed.
Here, you can also edit/delete the added invoices (under Actions).

17.3.15. Click on the BACK button to go to the GSTR-1 landing page and the Export Invoices tile in GSTR-1 will reflect the number of invoices added.

Click here to go back to main menu
Table 7- B2C Others
To add details of taxable outwards supplies to a customer where invoice value is less than Rs. 2.5 lakh and intra-state supplies to customers, perform the following steps:
17.4.1. Click the B2C (Others) tile to enter the details for B2C transactions.

17.4.2. The B2C (Others) Details – Summary page is displayed. Click the ADD DETAILS button to add the line item details.
Note: You can import the data from e-Way Bill (EWB) System by clicking on the IMPORT EWB DATA button. To view step-by-step instructions on how to do this, click here.

17.4.3. In the POS field, select the Place of Supply (State Code) where the supplies were delivered. Based on the state selected in POS, Supply Type field is auto-populated. In the Taxable Value field, enter the collated amount of all the unique goods or services supplied. In the Rate field, enter the applicable Rate.
17.4.3 (a) In case of Intra-State transaction: In case the POS (place of supply) of the goods/ services is the same state as that of the supplier, the transaction is an Intra-State transaction. Notice, fields for Central Tax and State/UT Tax will appear. In the Taxable Value field against the rates, enter the taxable value of the goods or services. In the Cess field, enter the cess amount.
Note: The Amount of Tax fields are auto-populated based on the values entered in Taxable Value fields respectively. However, the taxpayer can edit the tax amount.

17.4.3 (b) In case of Inter-State transaction: In case the POS (place of supply) of the goods/ services is the different from the state of the supplier, the transaction is an Inter-State transaction. Notice, field for Integrated Tax will appear. In the Taxable Value field against the rates, enter the taxable value of the goods or services. In the Cess field, enter the cess amount.
Note: The Amount of Tax fields are auto-populated based on the values entered in Taxable Value fields respectively. However, the taxpayer can edit the tax amount.
17.4.4. Click the SAVE button to save the invoice details.

Note: Add Invoice page will reopen once you save the record. You may continue adding new records using this form or click Back button to go back to Processed Records page.
17.4.5. Click the BACK button to go back to the Processed Records page.
Note:
The status of the added invoice is Processed.
Here, you can also edit/delete the added invoices (under Actions).

17.4.6. Click on the back button to go to GSTR-1 landing page and the B2C Others tile in Form GSTR-1 will reflect the number of invoices added.

Click here to go back to main menu
Table 8A, 8B, 8C, 8D - Nil Rated Supplies
To add an invoice for Nil Rated Supplies, Exempted and Non-GST Outward supplies, perform the following steps:
17.5.1. Click the Nil Rated Supplies tile to enter the details for Nil rated supplies.

17.5.2. The Nil Rated Supplies page is displayed. Enter the data in Nil Rated Supplies, Exempted (Other than Nil rated/non-GST supply), and Non-GST Supplies Amount fields for the following categories of transactions:
Inter-state supplies to registered person
Inter-state supplies to unregistered person
Intra-state supplies to registered person
Intra-state supplies to unregistered person
17.5.3. Click the SAVE button to save the details.

17.5.4. A message is displayed that Request accepted successfully. Click the BACK button to go back to the GSTR-1 page.

17.5.5. You will be directed to the GSTR-1 landing page and the Nil Rated Supplies tile in GSTR-1 will reflect the Total Nil Amount, Total Exempted Amount and Total Non-GST Amount.

Click here to go back to main menu
Table 9B - Credit / Debit Notes (Registered)
To add details of credit or debit notes for the registered user, perform the following steps:
17.6.1. Click the 9B - Credit / Debit Notes (Registered) tile to enter the details of credit or debit notes issued to the registered recipients.

Credit / Debit Notes (Registered) will have following 3 tabs:
• Recipient wise count- This tab displays details of records added by tax payer including hyperlinked counts of Processed and Pending/Errored Records.
• Document wise details- After clicking the hyperlink on the count of processed note, document wise details tab will open This tab displays the details of processed note (credit/debit notes) of a particular recipient added by the taxpayer.
• Pending/Errored Note- After clicking the hyperlink on the count of pending/errored note, Pending/Errored records tab will open. This tab displays the details of pending/errored note (credit/debit notes) of a particular recipient added by the taxpayer.
17.6.2. The Credit/Debit Notes (Registered) – Recipient wise count tab is displayed. Click the ADD RECORD button to add credit or debit note details.
• Details of all records added by taxpayer like Recipient Details, Trade/Legal Name, Taxpayer Type, Processed Note and Pending/Errored Note will be displayed in the table.
• You can import the data from e-Way Bill (EWB) System by clicking on the IMPORT EWB DATA button. To view step-by-step instructions on how to do this, click here.

17.6.3. The Credit / Debit Notes (Registered) – Add Note page is displayed. In the Receiver GSTIN/UIN field, nter the GSTIN of the receiver (registered taxpayer) to whom supply is made.
17.6.4 Select the checkbox for Deemed Exports or SEZ Supplies with payment or SEZ supplies without payment as applicable. Select the Supply attract Reverse Charge checkbox, in case supply made to the taxpayer is covered under the reverse charge mechanism. Select the checkbox provided Is the supply eligible to be taxed at a differential percentage (%) of the existing rate of tax, as notified by the Government?, in case supply is eligible to be taxed at a differential percentage of the existing rate of tax.
17.6.5. In the Debit/Credit Note No. field, enter the debit or credit note number.
Note: A Debit or Credit Note number should be unique for a given Financial Year (FY).
17.6.6. In the Debit/Credit Note Date field, enter the date on which the debit or credit Note was issued.
Note: The date should be before the end date of the tax period.
17.6.7. From the Note Type drop-down list, select whether the details added are for a Debit or Credit Note.
17.6.8. In the Note Value field, enter the value of the note.
17.6.8 (a) In case of Intra-State transaction: In case the POS (place of supply) of the goods/ services is the same state as that of the supplier, the transaction is an Intra-State transaction. Notice, fields for Central Tax and State/UT Tax will appear. In the Taxable Value field against the rates, enter the taxable value of the goods or services. In the Cess field, enter the cess amount.
Note: The Amount of Tax fields are auto-populated based on the values entered in Taxable Value fields respectively. However, the taxpayer can edit the tax amount.
Note:
Intra-State supplies attracting IGST will be enabled only when the supply attract reverse charge is selected by the taxpayer.
If the recipient GSTIN is ISD GSTIN, then all the checkboxes (note supply type) will be disabled.

17.6.8 (b) In case of Inter-State transaction: In case the POS (place of supply) of the goods/ services is the different from the state of the supplier, the transaction is an Inter-State transaction. Notice, field for Integrated Tax will appear. In the Taxable Value field against the rates, enter the taxable value of the goods or services. In the Cess field, enter the cess amount.
Note: The Amount of Tax fields are auto-populated based on the values entered in Taxable Value fields respectively. However, the taxpayer can edit the tax amount.
17.6.9. Click the SAVE button to save the details.

Note: Add Note page will reopen once you save the record. You may continue adding new records using this form or click Back icon/button to go back to Recipient wise count tab page.

17.6.10. You will be directed to the previous page. You can add note of the particular receiver by clicking on the green button in the Add Note column. Click the BACK icon/button to go back to the Form GSTR 1.

17.6.11. 16.6.11 Click on hyperlink of Processed Note count to edit processed notes.
Note: Follow similar steps for to edit Pending/Errored Note.

17.6.12 Document wise details tab is displayed. Details of processed records added by taxpayer like recipient details, legal name and note details will be displayed. Click the BACK button to go to Recipient wise count page.
Note:
- Click on Records Per Page drop-down to view up to 50 records per page.
- You can also search for a particular invoice using the Search field.

17.6.13. You will be directed to the GSTR-1 landing page and the 9B- Credit/ Debit Notes (Registered) tile in GSTR-1 will reflect the number of credit/debit notes added.

Click here to go back to main menu
Table 9B - Credit / Debit Notes (Unregistered)
To add details of credit or debit notes or refund vouchers issued to unregistered persons, perform the following steps:
17.7.1. Click the 9B - Credit / Debit Notes (Unregistered) tile to enter the details of credit or debit notes issued to the unregistered recipients.

17.7.2. The Credit/Debit Notes (Unregistered) - Summary page is displayed. Click the ADD DETAILS button to add credit or debit note.

17.7.3. The Credit / Debit Notes (Unregistered) – Add Note page is displayed. Select the checkbox provided Is the supply eligible to be taxed at a differential percentage (%) of the existing rate of tax, as notified by the Government?, in case supply is eligible to be taxed at a differential percentage of the existing rate of tax.
17.7.4. From the Type drop-down list, select the appropriate choice like B2CL, exports without payment and exports with payment.
17.7.5. In the Debit/Credit Note No. field, enter the debit or credit note number.
Note: A Debit or Credit Note number should be unique for a given Financial Year (FY).
17.7.6. In the Debit/Credit Note Date field, enter the date on which the debit or credit Note was issued.
Note: The date should be before the end date of the tax period.
17.7.7 In the Note Value field, enter the value of the note.
17.7.8. From the Note Type drop-down list, select whether the details are added for a Debit or Credit Note.
17.7.9. In Credit/Debit Notes (Unregistered) if UR type is B2CL, then POS will be inter-state always. In case if UR type is Exports, then POS filed will not be shown, Hence, supply type will be always inter-state and non-editable. Notice, fields for Integrated Tax appear. In the Taxable Value field against the rates, enter the taxable value of the goods or services. In the Cess field, enter the cess amount.
Note: The Amount of Tax fields are auto-populated based on the values entered in Taxable Value fields respectively. However, the taxpayer can edit the tax amount.
17.7.10. Click the SAVE button to save the details.

Note: Add Note page will reopen once you save the record. You may continue adding new records using this form or click Back icon/button to go back to Processed Records page.
17.7.11. Click the BACK button to go back to the Processed Records page.
Note:
The status of the added invoice is Processed.
Here, you can also edit/delete the added invoices (under Actions).

17.4.12. You will be directed to the GSTR-1 landing page and the 9B- Credit/ Debit Notes (Unregistered) tile in GSTR-1 will reflect the number of credit/debit notes added along with, Total Taxable Value and tax amount which will be the net of debit notes and credit notes.

Click here to go back to main menu
Table 11A(1), 11A(2) - Tax Liability (Advances Received)
To add details of Tax Liability (Advances Received) arising on account of Time of Supply without issuance of Invoice in the same period, perform the following steps:
17.8.1. Click the Tax Liability (Advances Received) tile to enter the tax liability details

17.8.2. The Tax Liability (Advance Received) – Summary page is displayed. Click the ADD STATE WISE DETAILS button to add the advance tax receipt and related liability details.

17.8.3. In the POS field, select the State code of the place of supply applicable for the advances received. .
Note: Based on the state code selected, Supply Type column would be auto-populated as Inter-state or Intra-state.
17.8.3 (a) In case of Intra-State transaction: Notice, fields for Central Tax, State/UT Tax & CESS will appear in the screen. In the Gross Advance Received field, enter the amount paid by the receiver to the supplier for the goods/service provided by the supplier without issuing of any invoice for the goods/services against the applicable Rate (%). In the Central Tax, State/UT Tax field, system will auto-populate the Central Tax and State/UT Tax amount. The same will be editable. In the CESS field, enter the CESS amount.

17.8.3 (b) In case of Inter-State transaction: Notice, fields for Integrated Tax & CESS will appear in the screen. In the Gross Advance Received field, enter the amount paid by the receiver to the supplier for the goods/service provided by the supplier without issuing of any invoice for the goods/services against the applicable Rate (%). In the Integrated Tax field, system will auto-populate the Integrated Tax amount. This will be an editable field. In the CESS field, enter the CESS amount.
17.8.4. Click the SAVE button.

Note: Add Details page will reopen once you save the record. You may continue adding new records using this form or click Back icon/button to go back to Processed Records page.
17.8.5. You will be directed to the previous page and a message is displayed that Request accepted successfully. Click the BACK button to go back to the GSTR-1 page.
Note:
The status of the added invoice is Processed.
Here, you can also edit/delete the added invoices (under Actions).

17.8.6. You will be directed to the GSTR-1 landing page and the Tax Liability (Advance Recieved) tile in GSTR-1 will reflect the updated total Gross Advance Received and Total Tax Liability.

Click here to go back to main menu
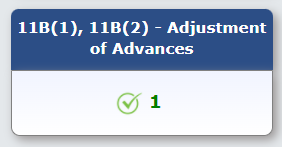
Table 11B(1), 11B(2) - Adjustment of Advances
To fill details of Adjustment of Advances on invoices issued in the current period, perform the following steps.
17.9.1. Click the 11B(1), 11B(2)- Adjustment of Advances tile to enter the details of tax already paid on invoices issued in the current period.

17.9.2. The Tax already paid on invoices issued in the current period – Summary page is displayed. Click the ADD STATE WISE DETAILS button to add details for invoices issued in the current period on which tax has already been paid.

17.9.3. The Tax already paid on invoices issued in the current period - Add Details page is displayed. Select the POS from the drop-down list.
17.9.3 (a) In case of Intra-State transaction: Notice, fields for Central Tax, State/UT Tax & CESS will appear in the screen. In the Gross Advance Adjusted (excluding tax) field, enter the amount paid by the receiver to the supplier for the goods/service provided by the supplier without issuing of any invoice for the goods/services against the applicable Rate (%). In the Central Tax, State/UT Tax field, system will auto-populate the Central Tax and State/UT Tax amount. The same will be editable. In the CESS field, enter the CESS amount.

17.9.3 (b) In case of Inter-State transaction: Notice, fields for Integrated Tax & CESS will appear in the screen. In the Gross Advance Adjusted field, enter the amount paid by the receiver to the supplier for the goods/service provided by the supplier without issuing of any invoice for the goods/services against the applicable Rate (%). In the Integrated Tax field, system will auto-populate the Integrated Tax amount. This will be an editable field. In the CESS field, enter the CESS amount.
17.9.4. Click the SAVE button.

Note: Add Details page will reopen once you save the record. You may continue adding new records using this form or click Back icon/button to go back to Processed Records page.
17.9.5. You will be directed to the previous page and a message is displayed that Request accepted successfully. Click the BACK button to go back to the GSTR-1 page.
Note:
The status of the added invoice is Processed.
Here, you can also edit/delete the added invoices (under Actions).

17.9.6. You will be directed to the GSTR-1 landing page and the Adjustment of Advances tile in GSTR-1 will reflect the updated total Gross Advance Adjusted and Total Tax Liability.
Click here to go back to main menu
Table 12 - HSN-wise-summary of outward supplies - From May'21 Onwards
To furnish the HSN-wise summary of outward supplies along with rate and quantitative details, perform the following steps:
17.10.1. Click the HSN-wise summary of outward supplies tile to furnish the summarized details of all outward supplies HSN-wise along with rate and quantitative details.
Note: You can import the data from e-Way Bill (EWB) System by clicking on the IMPORT EWB DATA button. To view step-by-step instructions on how to do this, click here.

17.10.2. The HSN summary of outward supplies – Add/Edit Details page is displayed.
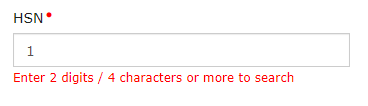
17.10.3. In the HSN field, enter the HSN/SAC code of the outward supplies.
Note1:
Taxpayer can select HSN code by entering at least 2 digits or 4 characters in the field for HSN. When taxpayer enters digits/characters in HSN field, related details will appear in the drop-down list. Taxpayer can select the relevant HSN code from the drop down and description will be auto-populated.

Note2:
If only one digit of HSN is entered, an error message will appear.
Note3:
If the user enters an invalid HSN, an error message will appear. The user can still add the record with the entered HSN which is not available in the field.

Note4:
• If the user enters a single digit in HSN, an error message will appear.

Note5:
• If the user enters more than 8 digits in the HSN, an error message will appear.

Note6:
• If a taxpayer, whose turnover is more than 5 crores, enters less than 4 digits of HSN, an error will appear.

Taxpayer can search HSN code by description also. For Example: If taxpayer enters Telephone in HSN field, all HSN codes having Telephone in HSN description will come in drop-down list and taxpayer can select from available values.

17.10.4. In the UQC field, select the appropriate Unique Quantity Code in the drop-down list.
17.10.5. In the Total Quantity field, enter the quantity.
17.10.6. In the Total Taxable Value field, enter the Total Taxable Value of the outward supply.
17.10.7. In the Rate field, select the Rate from the drop-down list.
17.10.8. After the UQC and Rate are selected an Add to Master button appears below the HSN field. From here, you can add the product to My Master.
Note 7:
- Taxpayer can also make an entry for the HSN code manually in the HSN field, if he/she is unable to find the requisite HSN code in the drop down.
- The combination of HSN, UQC and Rate must be unique. GST Portal will not allow more than one entry with same HSN, UQC and Rate combination.
- For Example: If taxpayer has entered 1100 as HSN code, Kg as UQC and rate as 5%, they cannot add another entry with same HSN, UQC and rate. But he can add another entry with 1100 as HSN code, Kg as UQC and rate as 12%.

17.10.9. Click the Add to Master button. A pop-up titled Add Product Master appears. Enter the Product Name and click the Save button.

17.10.10. A success message will appear. Close the pop-up. The Product Name as saved in My Master will be auto-populated.

Note:
• The HSN data added here will now also be available in the Product Master table.
• If the product already exists in the Product master, the name of the product can be entered in the HSN field and the same will reflect in the drop-down. The HSN code, HSN escription, Product Name in master, UQC and Rate will then be auto-populated.
17.10.11. In the Integrated Tax and Cess field, enter the Integrated tax and the Cess amount.
17.10.12. In the Total Taxable Value field, enter the Total Taxable Value of the outward supply.
17.10.13. In the Central tax field, enter the Central tax amount.
17.10.14. In the State/UT tax field, enter the State/UT tax amount.
17.10.15. Click the ADD button.

17.10.16. Once the ADD button is clicked, the added records are moved to Added/Edited Invoices to be saved section. Once all details are added, click the SAVE button.
Note:
- You can click the EDIT button to edit the added details.
- You can click the DELETE button to delete the added details.
- You can click the RESET button to delete all the added details at one-go.
- You can add more HSN wise details by entering the HSN Code in HSN field.
- You can use Search feature to search for required details, which is applicable across all columns.
- To view records per page, select the required number of records from the Records Per Page drop-down list.
- To search in the list of added records, enter the relevant text/value in the Search field.

17.10.17. A message is displayed that Request accepted successfully. On click of save, records will move to processed table from added/edited invoices to be saved table. Click the BACK button to go back to the Form GSTR-1 page.

17.10.18. You will be directed to the Form GSTR-1 landing page and the HSN summary of outward supplies tile in Form GSTR-1 will reflect the number of invoices added along with Total Value, Total Taxable Value and Total Tax Liability.

Click here to go back to main menu
Table 12 - HSN-wise-summary of outward supplies - Before May'21
To furnish the HSN-wise summary of outward supplies, along with quantitative details, before May'21, perform the following steps:
17.11.1. Click the HSN-wise summary of outward supplies tile to furnish the summarized details of all outward supplies, HSN-wise, along with quantitative details.
Note: You can import the data from e-Way Bill (EWB) System by clicking on the IMPORT EWB DATA button. To view step-by-step instructions on how to do this, click here.
17.10.2. The HSN summary of outward supplies – Add/Edit Details page is displayed.
17.10.3. In the HSN field, enter the HSN/SAC code of the outward supplies.
Note1:
Taxpayer can select HSN code by entering at least 2 digits or 4 characters in the field for HSN. When taxpayer enters digits/characters in HSN field, related details will appear in the drop-down list. Taxpayer can select the relevant HSN code from the drop down and description will be auto-populated.
Note2:
If only one digit of HSN is entered, an error message will appear.
Note3:
If the user enters an invalid HSN, an error message will appear. The user can still add the record with the entered HSN which is not available in the field.
Note4:
• If the user enters a single digit in HSN, an error message will appear.
![]()
Note5:
• If the user enters more than 8 digits in the HSN, an error message will appear.
Note6:
• If a taxpayer, whose turnover is more than 5 crores, enters less than 4 digits of HSN, an error will appear.
Taxpayer can search HSN code by description also. For Example: If taxpayer enters Telephone in HSN field, all HSN codes having Telephone in HSN description will come in drop-down list and taxpayer can select from available values.
17.10.4. In the UQC field, select the appropriate Unique Quantity Code in the drop-down list.
17.10.5. In the Total Quantity field, enter the quantity.
17.10.6. In the Total Taxable Value field, enter the Total Taxable Value of the outward supply.
17.10.7. In the Rate field, select the Rate from the drop-down list.
17.10.8. After the UQC and Rate are selected an Add to Master button appears below the HSN field. From here, you can add the product to My Master.
Note 7:
- Taxpayer can also make an entry for the HSN code manually in the HSN field, if he/she is unable to find the requisite HSN code in the drop down.
- The combination of HSN, UQC and Rate must be unique. GST Portal will not allow more than one entry with same HSN, UQC and Rate combination.
- For Example: If taxpayer has entered 1100 as HSN code, Kg as UQC and rate as 5%, they cannot add another entry with same HSN, UQC and rate. But he can add another entry with 1100 as HSN code, Kg as UQC and rate as 12%.
17.10.9. Click the Add to Master button. A pop-up titled Add Product Master appears. Enter the Product Name and click the Save button.
17.10.10. A success message will appear. Close the pop-up. The Product Name as saved in My Master will be auto-populated.
Note:
• The HSN data added here will now also be available in the Product Master table.
• If the product already exists in the Product master, the name of the product can be entered in the HSN field and the same will reflect in the drop-down. The HSN code, HSN escription, Product Name in master, UQC and Rate will then be auto-populated.
17.10.11. In the Integrated Tax and Cess field, enter the Integrated tax and the Cess amount.
17.10.12. In the Total Taxable Value field, enter the Total Taxable Value of the outward supply.
17.10.13. In the Central tax field, enter the Central tax amount.
17.10.14. In the State/UT tax field, enter the State/UT tax amount.
17.10.15. Click the ADD button.

17.10.16. Once the ADD button is clicked, the added records are moved to Added/Edited Invoices to be saved section. Once all details are added, click the SAVE button.
Note:
- You can click the EDIT button to edit the added details.
- You can click the DELETE button to delete the added details.
- You can click the RESET button to delete all the added details at one-go.
- You can add more HSN wise details by entering the HSN Code in HSN field.
- You can use Search feature to search for required details, which is applicable across all columns.
- To view records per page, select the required number of records from the Records Per Page drop-down list.
- To search in the list of added records, enter the relevant text/value in the Search field.
17.10.17. A message is displayed that Request accepted successfully. On click of save, records will move to processed table from added/edited invoices to be saved table. Click the BACK button to go back to the Form GSTR-1 page.
17.10.18. You will be directed to the Form GSTR-1 landing page and the HSN summary of outward supplies tile in Form GSTR-1 will reflect the number of invoices added along with Total Value, Total Taxable Value and Total Tax Liability.
Click here to go back to main menu
Table 12 - HSN-wise-summary of outward supplies - Before May'21
Note: To furnish the HSN-wise summary of outward supplies, along with quantitative details, before May'21, perform the following steps:
17.11.1. Click the HSN-wise summary of outward supplies tile to furnish the summarized details of all outward supplies, HSN-wise, along with quantitative details.
Note: You can import the data from e-Way Bill (EWB) System by clicking on the IMPORT EWB DATA button. To view step-by-step instructions on how to do this, click here.

17.11.2. The HSN-wise summary of outward supplies– Summary page is displayed. Click the ADD DETAILS button to add details for invoices issued in the current period.

17.11.3. The HSN summary of outward supplies – Add/Edit Details page is displayed.
17.11.4. In the HSN field, enter as per the applicable provision of reporting HSN code of the outward supplies.
17.11.5. In the Description field, enter the description. (Either HSN or Description should be mandatorily entered)
17.11.6. In the UQC field, select UQC.
17.11.7. In the Total Quantity field, enter the quantity of the outward supply.
17.11.8. In the Total Value field, enter the Total Value of the outward supply.
17.11.9. In the Total Taxable Value field, enter the Total Taxable Value of the outward supply.
17.11.10. In the Integrated Tax, Central TAX, State Tax and CESS field, enter the Integrated Tax, Central TAX, State Tax and CESS amount.
17.11.11. Click the ADD button.

17.11.12. Click the SAVE button.

17.11.13. You will be directed to the previous page and a message is displayed that Request accepted successfully. Click the BACK button to go back to the Form GSTR-1 page.
Note:
The status of the added invoice is Processed after sometime.
Here, you can also edit/delete the added invoices (using icons under Actions).

17.11.14. You will be directed to the Form GSTR-1 landing page and the HSN summary of outward supplies tile in Form GSTR-1 will reflect the number of invoices added along with Total Value, Total Taxable Value and Total Tax Liability.

Click here to go back to main menu
Table 13 - Documents Issued
To Upload the details of Documents issued perform the following steps.
17.12.1. Click the Documents Issued tile to add the details for document issued during the current tax period.

17.12.2. To update the document for Invoices for outward supply, Click on Add Document:

17.12.3. Add the details for different categories. You can click ADD DOCUMENT button to add more rows for each category.
17.12.4. Click SAVE at the end of the page.

17.12.5. A message is displayed that Request accepted successfully. Click the BACK button to go back to the GSTR-1 page.
Note: Here, you can also delete the added invoices (under Actions).

17.12.6. You will be directed to the GSTR-1 landing page and the Documents Issued summary tile in GSTR-1 will reflect the number of documents issued along with Total Docs, Cancelled Docs and Net Issued Docs.

Click here to go back to main menu
Table 9A - Amended B2B Invoice
To make amendments to details of outward supplies to a registered person furnished in returns of earlier tax periods, perform the following steps:
17.13.1. Click the 9A - Amended B2B Invoice tile.

17.13.2. Select the Financial Year from the drop-down list. In the Invoice No. field, enter the invoice number which you want to amend from earlier tax period. Click the AMEND INVOICE button.

17.13.3. In the Revised Invoice No. field, enter the revised invoice number for the previous invoice. Select the Revised Date using the calendar. Make amendments to the details as required. Click the SAVE button.
Note: Intra-State supplies attracting IGST will be enabled only when the supply attract reverse charge is selected by the taxpayer.

17.13.4. You will be directed to the previous page and a message is displayed that Request accepted successfully. Click the BACK button to go back to the GSTR-1 page.
Note:
The status of the added invoice is Processed.
Here, you can also edit/delete the added invoices (under Actions).
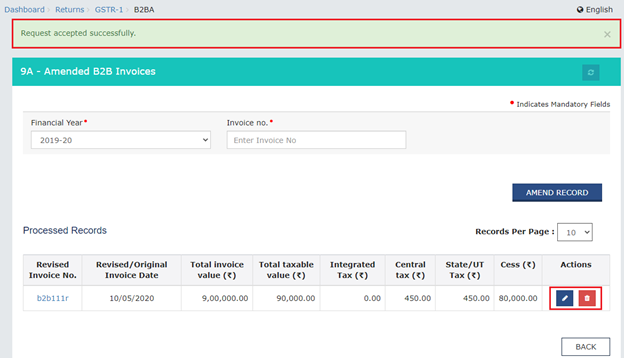
17.6.5. You will be directed to the GSTR-1 landing page and the 9A - Amended B2B Invoice tile in GSTR-1 will reflect the number of such invoices amended along with Total Tax Liability. It should be noted that you have to pay the tax in this tax period only on the differential liability.

Click here to go back to main menu
Table 9A - Amended B2C (Large) Invoice
To make amendments to taxable outward supplies to an unregistered person of earlier tax periods, perform the following steps:
17.14.1. Click the 9A - Amended B2C (Large) Invoice tile.

17.14.2. Select the Financial Year from the drop-down list. In the Invoice No. field, enter the invoice number which you want to amend from earlier tax period. Click the AMEND INVOICE button.

17.14.3. In the Revised/ Original Invoice No. field, enter the revised or original invoice number for the previous invoice. Select the Revised/ Original Invoice Date using the calendar. Make amendments to the details as required. You cannot amend the POS of the invoice furnished earlier. Click the SAVE button.

17.14.4. You will be directed to the previous page and a message is displayed that Request accepted successfully. Click the BACK button to go back to the GSTR-1 page.
Note:
The status of the added invoice is Processed.
Here, you can also edit/delete the added invoices (under Actions).

17.14.5. You will be directed to the GSTR-1 landing page and the 9A - Amended B2C (Large) Invoice tile in GSTR-1 will reflect the number of such invoices amended along with Total Tax Liability. It should be noted that you have to pay the tax in this tax period only on the differential liability.

Table 9A - Amended B2C (Large) Invoice
To make amendments to taxable outward supplies to an unregistered person of earlier tax periods, perform the following steps:
17.14.1. Click the 9A - Amended B2C (Large) Invoice tile.
17.14.2. Select the Financial Year from the drop-down list. In the Invoice No. field, enter the invoice number which you want to amend from earlier tax period. Click the AMEND INVOICE button.
17.14.3. In the Revised/ Original Invoice No. field, enter the revised or original invoice number for the previous invoice. Select the Revised/ Original Invoice Date using the calendar. Make amendments to the details as required. You cannot amend the POS of the invoice furnished earlier. Click the SAVE button.
17.14.4. You will be directed to the previous page and a message is displayed that Request accepted successfully. Click the BACK button to go back to the GSTR-1 page.
Note:
The status of the added invoice is Processed.
Here, you can also edit/delete the added invoices (under Actions).
17.14.5. You will be directed to the GSTR-1 landing page and the 9A - Amended B2C (Large) Invoice tile in GSTR-1 will reflect the number of such invoices amended along with Total Tax Liability. It should be noted that you have to pay the tax in this tax period only on the differential liability.
Click here to go back to main menu
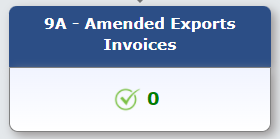
Table 9A - Amended Exports Invoices
To make amendments to supplies exported, perform the following steps:
17.15.1. Click the 9A - Amended Exports Invoices tile.
17.15.2. Select the Financial Year from the drop-down list. In the Invoice No. field, enter the invoice number which you want to amend from earlier tax period. Click the AMEND INVOICE button.

17.15.3. In the Revised/ Original Invoice No. field, enter the revised or original invoice number for the previous invoice. Select the Revised/ Original Invoice Date using the calendar. Make amendments to the details as required. Click the SAVE button.

17.15.4. You will be directed to the previous page and a message is displayed that Request accepted successfully. Click the BACK button to go back to the GSTR-1 page.
Note:
The status of the added invoice is Processed.
Here, you can also edit/delete the added invoices (under Actions).

17.15.5. You will be directed to the GSTR-1 landing page and the 9A - Amended Exports Invoices tile in GSTR-1 will reflect the number of such invoices amended along with Total Tax Liability. It should be noted that you have to pay the tax in this tax period only on the differential liability.

Click here to go back to main menu
Table 9C - Amended Credit/ Debit Notes (Registered)
To make amendments to details of credit or debit notes issued to the registered recipients of earlier tax periods, perform the following steps:
17.16.1. Click the 9C - Amended Credit/ Debit Notes (Registered) tile.

17.16.2. Select the Financial Year from the drop-down list. In the Credit/Debit Note No. field, enter the credit or debit number which you want to amend from earlier tax period. Click the AMEND NOTE button.

17.16.3. In the Revised Credit/ Debit Note No. field, enter the revised credit or debit Note number. Select the Revised Credit/ Debit Note Date using the calendar. Make amendments to the details as required. Click the SAVE button.
Note:
Intra-State supplies attracting IGST will be enabled only when the supply attract reverse charge is selected by the taxpayer.
If the recipient GSTIN is ISD GSTIN, then all the checkboxes (note supply type) will be disabled.

17.16.4. You will be directed to the previous page and a message is displayed that Request accepted successfully. Click the BACK button to go back to the GSTR-1 page.
Note:
The status of the added invoice is Processed.
Here, you can also edit/delete the added invoices (under Actions).

17.16.5. You will be directed to the GSTR-1 landing page and the 9C - Amended Credit/ Debit Notes (Registered) tile in GSTR-1 will reflect the number of such invoices amended along with Taxable value and Tax amount which will be the differential amount (net of amended debit notes – amended credit notes)

Click here to go back to main menu
Table 9C - Amended Credit/ Debit Notes (Unregistered)
To make amendments to details of credit or debit notes issued to the unregistered recipients of earlier tax periods, perform the following steps:
17.17.1. Click the 9C - Amended Credit/ Debit Notes (Unregistered) tile.

17.17.2. Select the Financial Year from the drop-down list. In the Credit/Debit Note No. field, enter the credit or debit note number which you want to amend from earlier tax period. Click the AMEND NOTE button.

17.17.3. In the Revised Debit/ Credit Note No. field, enter the revised credit or debit number. Select the Revised Debit/ Credit Note Date using the calendar. Make amendments to the details as required. Click the SAVE button.

17.17.4. You will be directed to the previous page and a message is displayed that Request accepted successfully. Click the BACK button to go back to the GSTR-1 page.
Note:
The status of the added invoice is Processed.
Here, you can also edit/delete the added invoices (under Actions).

17.17.5. You will be directed to the GSTR-1 landing page and the 9C - Amended Credit/ Debit Notes (Unregistered) tile in GSTR-1 will reflect the number of such invoices amended along with taxable value and tax amount which will be the differential amount (net of amended debit notes – amended credit notes).

Click here to go back to main menu
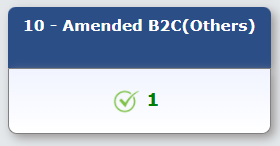
Table 10 - Amended B2C (Others)
To amend details of B2C furnished in earlier tax period, perform the following steps:
17.18.1. Click the 10 - Amended B2C (Others) tile.

17.18.2. Select the Year of the line item of the declarations of previous tax period from the drop-down list. Select the Month of the line item of the declarations of previous tax period from the drop-down list. Select the Original POS of line item of the declarations of previous tax period from the drop-down list. Click the AMEND DETAILS button.

Note: In case you didn’t add POS in previous returns, enter Year, Month and Original POS using drop-down and click on ADD POS button.

17.18.3. Select the Revised/Original State Code (Place of Supply) from the drop-down list. Make the amendments as required. You cannot amend the Place of Supply field/s of the line items furnished earlier. Click the SAVE button.

17.18.4. You will be directed to the previous page and a message is displayed that Request accepted successfully. Click the BACK button to go back to the GSTR-1 page.
Note:
The status of the added invoice is Processed.
Here, you can also edit/delete the added invoices (under Actions).

17.18.5. You will be directed to the GSTR-1 landing page and the 10 - Amended B2C (Others) tile in GSTR-1 will reflect the number of such invoices amended along with Total Tax Liability. It should be noted that you have to pay the tax in this tax period only on the differential liability.
Click here to go back to main menu
Table 11A - Amended Tax Liability (Advance Received):
To amend statement of Advances Received in earlier tax period, perform the following steps:
17.19.1. Click the 11A - Amended Tax Liability (Advance Received) tile.

17.19.2. Select the Financial Year of the line item declarations of previous tax period you wish to amend from the drop-down list. Select the POS of the line item of the declarations of previous tax period from the drop-down list. Select the Return Filing Period of the declarations of previous tax period from the drop-down list. Click the AMEND INVOICE button.

17.19.3. Make the amendments as required. You cannot amend the Advance Tax Place of Supply (PoS) field/s of the line items furnished earlier. Click the SAVE button.

17.19.4. You will be directed to the previous page and a message is displayed that Request accepted successfully. Click the BACK button to go back to the GSTR-1 page.
Note:
The status of the added invoice is Processed.
Here, you can also edit/delete the added invoices (under Actions).

17.19.5. You will be directed to the GSTR-1 landing page and the 11A - Amended Tax Liability (Advance Received) tile in GSTR-1 will reflect the number of such invoices amended along with Total Tax Liability. It should be noted that you have to pay the tax in this tax period only on the differential liability.

Click here to go back to main menu
Table 11B - Amended of Adjustment of Advances
To amend statement of Advances Adjusted in earlier tax period, perform the following steps:
17.20.1. Click the 11B - Amended of Adjustment of Advances tile.

17.20.2. Select the Financial Year of the line item of the declarations of previous tax period from the drop-down list. Select the POS of the line item of the declarations of previous tax period from the drop-down list. Select the Return Filing Period of the line item of the declarations of previous tax period from the drop-down list. Click the AMEND INVOICE button.

17.20.3. Make the amendments as required. You cannot amend the Advance Tax Place of supply (PoS) field/s of the line items furnished earlier. Click the SAVE button.

17.20.4. You will be directed to the previous page and a message is displayed that Request accepted successfully. Click the BACK button to go back to the GSTR-1 page.
Note:
The status of the added invoice is Processed.
Here, you can also edit/delete the added invoices (under Actions).

17.20.5. You will be directed to the GSTR-1 landing page and the 11B - Amended of Adjustment of Advances tile in GSTR-1 will reflect the number of such invoices amended along with Total Tax Liability. It should be noted that you have to pay the tax in this tax period only on the differential liability.

Click here to go back to main menu
H. Preview Form GSTR-1
18. Click the Proceed to File/Summary button to view the table-wise consolidated summary of added records.
Note:
Please ensure that the values entered for each record is correct before you click on Proceed to File/Summary button. The values cannot be edited or deleted once the GSTR-1 statement is filed.

19.1. The consolidated summary page will be displayed. The consolidated summary page will also provide recipient-wise summary, containing the total value of the supplies & the total tax involved in such supplies. To view download the summary, click the Download Summary (PDF) button.
Note:
To view the details in the summary, click the Expand All button in the Description column.


Note:
- To view the details in the summary, click the Expand All button in the Description column.
- The summary table will also provide the recipient wise summary (only if the recipient count is <=100) with respect to the following tables of form GSTR-1/IFF:
| Table no. | Description |
| 4A | B2B Supplies |
| 4B | Supplies attracting reverse charge |
| 6A | SEZ supplies |
| 6C | Deemed exports |
| 9B | Credit/Debit notes |
Note: After generation of GSTR-1/IFF summary the status change from Not filed to Ready to file.
19.2. Draft Form GSTR-1 is downloaded in pdf format.

Click here to go back to main menu
I. File Form GSTR-1 with DSC/ EVC
20. Refresh the page and the status of Form GSTR-1 changes to Submitted. Click the FILE RETURN button.

21. The Returns Filing for form GSTR1 page is displayed. Select the Declaration checkbox. In the Authorised Signatory drop-down list, select the authorized signatory. Click the FILE WITH DSC or FILE WITH EVC button to file GSTR-1.
Note: On filing of Form GSTR-1, notification through e-mail and SMS is sent to the Authorized Signatory.

22.1 FILE WITH DSC:
a. Click the PROCEED button.
b. Select the certificate and click the SIGN button.
22.2 FILE WITH EVC:
a. Enter the OTP sent on email and mobile number of the Authorized Signatory registered at the GST Portal and click the VERIFY button.

23. The success message is displayed and ARN is displayed. Status of the GSTR-1 return changes to "Filed".

Click here to go back to main menu
Manual > Creation, Saving, Payment of Taxes & Filing of Form GSTR-3B Return
How can I create, save, pay taxes and file Form GSTR-3B return?
Taxpayers are required to declare their GST liabilities for a particular tax period and discharge these liabilities in Form GSTR-3B. A normal taxpayer is required to file Form GSTR-3B returns for every tax period applicable.
Note:
• Taxpayer has to file Form GSTR-3B even if there is no business activity (Nil Return).
• Amendment of Form GSTR-3B is not allowed.
• For the taxpayers who have opted to file Form GSTR-1( Statement of Outward Supplies furnished by all normal and casual registered taxpayers) or for those whose GSTR-2B (Auto-drafted ITC statement) is generated by the system on monthly or quarterly frequency, GSTR-3B will be auto-generated by system and will be available on their GSTR-3B dashboard page.
• For the taxpayers who haven't opted to file Form GSTR-1, the liability values in GSTR-3B will not be auto-populated in Table 3.1.
• For the taxpayers whose Form GSTR-2B is not generated by the system yet, the ITC values in Table-4 & reverse charge liability in Table-3.1(d) of Form GSTR-3B will not be auto-populated.
• For the taxpayers who have opted to file GSTR-3B quarterly, the Form GSTR-2B is available both quarterly and monthly.
To create, save, pay taxes and file Form GSTR-3B return, perform the following steps:
Enter Details in Section - 3.1 Tax on outward and reverse charge inward supplies
Enter Details in Section - 5. Exempt, nil and Non-GST inward supplies
Login and Navigate to Form GSTR-3B – Monthly Return page
1. Access the www.gst.gov.in URL. The GST Home page is displayed. Login to the GST Portal with valid credentials.
Note:
The Returns Calendar for last 5 return periods status is displayed such as: Filed, Not Filed, To be Filed.
To change your return filing preference, click the Change link, which will direct you to the Opt-in Quarterly page. To view the steps to change returns filing preference, click here.

2. Click the Services > Returns > Returns Dashboard option.

3. The File Returns page is displayed. Select the Financial Year, Quarter (Quarter 1 - 4) & Period (Month) for which you want to file the return from the drop-down list. Click the SEARCH button.
Note:
- In case you are a Quarterly return filer, you are required to file Form GSTR-3B for the last month of the quarter, example June, September etc. Form GSTR-3B tile will not be available, if you select M1 or M2 of quarter, in such a case.
- If you are Micro, Small or MSME and wish to submit your interest for availing Mudra Loan upto 10 Lacs or MSME Loan upto 5 Cr., you can click on the hyperlink of click here.

- Fill the consent form and click on the SUBMIT button to share the details with Department of Financial Services.
- Following Message will be displayed. Click on CLOSE button to go back to Returns dashboard.
3.1. The File Returns page is displayed. This page displays the due date of filing the returns, which the taxpayer is required to file (using separate tiles). In the Form GSTR-3B tile, click the PREPARE ONLINE button.

3.2. A list of questions are displayed. You need to answer all the questions to show the relevant sections of Form GSTR 3B as applicable to you. Click the NEXT button. Based on your answers, relevant tables of Form GSTR-3B will be visible on the next screen. You may go back to previous screen by clicking on BACK button.
Note: In case of auto-population from Form GSTR-1 or Form GSTR-2B, only the first question will be displayed in the questionnaire page.
4. To file Nil return:
Nil return can be filed by you, by following steps, if you have not made any outward supply (commonly known as sale) and have NOT received (commonly known as purchase) any goods/ services and do not have any tax liability for that tax period.
a. Select Yes for option A. Click the NEXT button.
c. File GSTR-3B

5. To file Non-Nil return: The System Generated Summary for GSTR-3B is displayed. This page displays the details of GSTR-3B table, Source Form, Form Status, Summary Status and advisory. Click the CLOSE button to view Form GSTR-3B – Monthly Return page.

6. The Form GSTR-3B – Monthly Return page is displayed. Click the SYSTEM GENERATED GSTR-3B button to download and view system-computed details from Forms GSTR-1 & GSTR-2B (monthly or quarterly) in Form GSTR-3B.
Note: Based on the selection made in previous page, applicable tiles will be visible to you for providing the details.

Note:
You can click the SYSTEM GENERATED GSTR-3B to view system-computed details from Forms GSTR-1 & GSTR-2B and auto-populated interest details.
The values that are auto-populated in System Generated GSTR-3B is for the assistance of taxpayers. However, taxpayers have to ensure the correctness of the values being reported and filed in GSTR-3B in all respects.
The auto-populated values can be edited by the taxpayers, if required. The taxpayers can continue their filing with the edited values, and system will not restrict the same.

Note: If you have opted to file both GSTR-1 and GSTR-3B at quarterly frequency and has filed GSTR-1 and opted to/ out to file IFF for first two months of the quarter, the details in PDF are generated on month-wise basis.

There will be several tiles representing Tables to enter relevant details. Click on the tile names to provide requisite details, for the relevant tax period:
7. 3.1 Tax on outward and reverse charge inward supplies: To provide summary details of outward supplies and inward supplies liable to reverse charge and tax liability thereon.
8. 3.2 Inter-state supplies: To provide details of inter-state supplies made to unregistered persons, composition taxable persons and UIN holders and tax thereon.
9. 4. Eligible ITC: To provide summary details of Eligible ITC claimed, ITC Reversals and Ineligible ITC.
10. 5. Exempt, nil and Non-GST inward supplies: To provide summary details of exempt, nil and Non-GST inward supplies.
11. 5.1 Interest and Late Fee for previous Tax Period: To provide summary details of Interest and Late fee payable for previous tax period.
12. 6. Payment of Tax: To provide details of payment of taxes, interest and late fee.
Enter Details in Section - 3.1 Tax on outward and reverse charge inward supplies
To provide details of outward supplies and inward supplies liable to reverse charge, perform the following steps:
7.1. In Table 3.1(a,b,c,e) the details are auto-drafted from Form GSTR-1 in Form GSTR-3B. Whereas in table 3.1(d) the details are auto-drafted from Form GSTR-2B. Click the 3.1 Tax on outward and reverse charge inward supplies tile to view the auto-drafted details. You can also add/ modify the details in Table 3.1(a,b,c,d,e) if required.

7.2. Click the OK button.

7.3. Click the CONFIRM button.

Note 1: In case you have made any changes to the details auto-populated from Forms GSTR-1 & GSTR-2B in the below tables of Form GSTR-3B:
• 3.1 (a, b, c, e) – only downward
• 3.1 (d) – only downward
• 3.2 – downward
• Table 4A – upward (more than 0%)
• Table 4B – Downward (more than 0%)
Then the field(s) edited will be highlighted in red color and a warning message is displayed. You can check for the System Computed amount and amount entered by you by hovering over the box.
Note 2: The System will display both, auto-populated value and edited value upon hovering the mouse over the box .
.png)
7.4. You will be directed to the Form GSTR-3B landing page and the 3.1 Tax on outward and reverse charge inward supplies tile in Form GSTR-3B will reflect the added data in a summary form.
Note: You are advised to click on SAVE GSTR3B button at the bottom to save the data in the GST system, if you want to exit at this stage and come back later to complete the filing.

Enter Details in Section - 3.2 Inter-state supplies
To provide details of inter-State supplies made to unregistered persons, composition taxable persons and UIN holders and taxes thereon, perform the following steps:
8.1. In Table 3.2 Inter-State supplies the details are auto-drafted from Form GSTR-1. You can add/ modify the auto-drafted details if required. In case the edited details are in downward variance, then such fields will be highlighted in red color. Click the 3.2 Inter-State supplies tile to add/ modify the auto-drafted details.

Supplies made to Unregistered Persons
8.2. In the section Supplies made to Unregistered Persons, from the Place of Supply (State/UT) drop-down list, select the place of supply.
8.3. In the Total Taxable Value field, enter the total taxable value for each State/UT.
8.4. In the Amount of Integrated Tax field, enter the amount of integrated tax. Please ensure that the integrated tax amount provided here do not exceed the integrated tax liability declared at (a) row in Table-3.1. Only integrated tax amount has to be declared, cess amount is not required to be mentioned.
8.5. Click the ADD button to provide details of such supplies for another State. Delete the row if nothing is to be reported after clicking ADD button.
Note: Select the checkbox and click the REMOVE button to remove the data added. The system will accept only one entry for each place of supply. The details of tax paid on exports may not be entered here.

Supplies made to Composition Taxable Persons
8.2. In the section Supplies made to Composition Taxable Persons, from the Place of Supply (State/UT) drop-down list, select the place of supply.
8.3. In the Total Taxable Value field, enter the total taxable value for each State/UT.
8.4. In the Amount of Integrated Tax field, enter the amount of integrated tax. Please ensure that the integrated tax amount provided here do not exceed the integrated tax liability declared at (a) row in Table-3.1. Only integrated tax amount has to be declared, cess amount is not required to be mentioned.
8.5. Click the ADD button to provide details of such supplies for another State.
Note: Select the checkbox and click the REMOVE button if you want to remove the data added. The system will accept only one entry for each place of supply. The details of tax paid on exports may not be entered here. The information regarding supplies to composition taxable persons has to be based on the information available with the taxpayer.

Supplies made to UIN holders
8.2. In the section Supplies made to UIN holders, from the Place of Supply (State/UT) drop-down list, select the place of supply.
8.3. In the Total Taxable Value field, enter the total taxable value for each State/UT.
8.4. In the Amount of Integrated Tax field, enter the amount of integrated tax. Please ensure that the integrated tax amount provided here do not exceed the integrated tax liability declared at (a) row in Table-3.1. Only integrated tax amount has to be declared, cess amount is not required to be mentioned.
8.5. Click the ADD button to provide details of such supplies for another state.
Note: Select the checkbox and click the REMOVE button to remove the data added. The system will accept only one entry for each place of supply. The details of tax paid on exports may not be entered here. The information regarding supplies to UIN holders has to be based on the information available with the taxpayer.

8.6. Once all details are added, click the CONFIRM button.

8.7. You will be directed to the Form GSTR-3B landing page and the 3.2 Inter-State supplies tile in Form GSTR-3B will reflect the total of taxable value and integrated tax as declared in the details table.
Note: You are advised to click on SAVE GSTR3B button at the bottom to save the data in the GST system, if you want to exit at this stage and come back later to complete the filing.

Enter ITC Details in Section - 4. Eligible ITC
To provide details of eligible ITC claimed, perform the following steps:
9.1. Click the 4. Eligible ITC tile.

9.2. The details of ITC claimed/ ITC reversed in table 4A (1, 3, 4, 5) and 4B (2) are auto-populated from Form GSTR-2B in Form GSTR-3B. If, you want to add/ modify the auto-populated details, you can add/ modify the details if required. Click the CONFIRM button.

Note:
• If the data entered by you is in upward variance (0%) with the auto-populated data in table 4A, then such fields will be highlighted in red, and the updated tile on the dashboard will be in red.
• If the data entered by you is in downward variance (0%) with the auto-populated data in table 4B, then such fields will be highlighted in red color and updated tile on dashboard will be in red color as well.
A sample screenshot is added below for reference.


9.3. You will be directed to the Form GSTR-3B landing page and the 4. Eligible ITC tile in Form GSTR-3B will reflect the total value of Integrated Tax, Central Tax, State/UT Tax and Cess net ITCs.
Note: You are advised to click on SAVE GSTR3B button at the bottom to save the data in the GST system, if you want to exit at this stage and come back later to complete the filing.

Enter Details in Section - 5. Exempt, nil and Non-GST inward supplies
To add values of exempt, Nil and Non-GST inward supplies, perform the following steps:
10.1. Click the 5. Exempt, nil and Non-GST inward supplies tile.

10.2. Enter the Inter-state and Intra-state supplies under respective Nature of Supplies head. Click the CONFIRM button.

10.3. You will be directed to the Form GSTR-3B landing page and the 5. Exempt, nil and Non-GST inward supplies tile in Form GSTR-3B will reflect the total value of Inter-state and Intra-state supplies.
Note: You are advised to click on SAVE GSTR3B button at the bottom to save the data in the GST system, if you want to exit at this stage and come back later to complete the filing.

Enter Details in Section - 5.1 Interest and Late Fee for Previous Tax Period
The details of Interest and Late fee for previous tax period are computed and auto-drafted on the basis of values declared in the previous period return. In case you want to add/ modify the auto-drafted details of the Interest and Late fee payable, perform the following steps:
11.1. Click the 5.1 Interest and Late fee for previous tax period tile.

11.2.Select the checkbox for declaration in case you wish to declare any interest liability. The interest values will be computed by the system and auto-populated on the basis of the tax-period wise breakup of tax liability declared in previous return period. The late fee would also be system computed based on the number of days elapsed after the due date of filing GSTR-3B for previous return period. Click on SYSTEM GENERATED GSTR-3B button to view and download the pending liability breakup.

Note: You can click on View Your Turnover button to view turnover details of the GSTIN.

11.3 Click on CONFIRM button to proceed filing GSTR-3B.
Note: In case you have made any downward change to the auto-drafted interest values, then the field(s) edited will be highlighted in red color and a warning message will be displayed. You can check for the System Computed amount and amount entered by you by hovering over the box.

11.4. You will be directed to the Form GSTR-3B landing page and the Interest and Late fee for previous tax period tile in Form GSTR-3B will reflect total value of Integrated Tax, Central Tax, State/UT Tax and Cess of previous tax period.
Note: You are advised to click on SAVE GSTR3B button at the bottom to save the data in the GST system, if you want to exit at this stage and come back later to complete the filing.

12. Once all details are added, click the SAVE GSTR3B button at the bottom of the page to save the Form GSTR-3B details.

12.1 A success message is displayed after sometime on the top of the page that the last save request has been processed successfully.
Note: You are advised to save if you want to exit after partially entering the data anytime while filing Form GSTR-3B.
Preview Draft Form GSTR-3B
13. Scroll down the page and click the PREVIEW DRAFT GSTR-3B button to view the summary page of Form GSTR-3B for your review. This button will download the draft Summary page of your Form GSTR-3B for your review. It is recommended that you download this Summary page and review the entries made in different sections with patience before proceeding with the payment. The PDF file generated would bear watermark of draft as the liabilities are yet to be offset.

14. The PDF is displayed.

Enter Payment Details in Section - 6.1 Payment of Tax
To pay the taxes and offset the liability, perform the following steps:
15. Click the PROCEED TO PAYMENT button.

Note:
- In case you are a Quarterly return filer, you can view the payments made during the quarter using the PAYMENT MADE IN QUARTER button.

- Clicking the PAYMENT MADE IN QUARTER button displays the payment details in the following format.

16. The cash available as on date and ITC available (considering ITC of current tax period) are shown in below table.

16.1. Use the scroll bar to move to the right to view the Credit Ledger Balance.

17. Please provide the amount of credit to be utilized from the respective available credit heads to pay off the liabilities, so as the cash.
Note:
System auto-populates “Tax to be paid through ITC” fields with optimum utilization amounts based on provisions of the law relating to credit utilization. However, you may edit the ITC utilization. As you change ITC utilization, the cash to be paid will also get changed.
Tax liabilities as declared in the return along with the credits gets updated in the ledgers and reflected in the “Tax payable” column of the payment section. Credits get updated in the credit ledger and the updated balance is available and can be seen while hovering on the said headings of credit in the payment section.
Scenario 1: If available cash balance in Electronic Cash Ledger is less than the amount required to offset the liabilities
If available cash balance in Electronic Cash Ledger is less than the amount required to offset the liabilities, available cash balance is utilized from the Electronic Cash Ledger and additional cash required for paying liability is being reflected in the last column of the Table (Addition cash required). You may create challan for that additional cash directly by clicking on the CREATE CHALLAN button.

17.1. Use the scroll bar to move to the right to view the additional cash required for paying liability.

Scenario 2: If available cash balance in Electronic cash ledger is more than the amount required to offset the liabilities
If available cash balance in Electronic Cash Ledger is more than the amount required to offset the liabilities, no additional cash is required for paying liability and zero amount is being reflected in the last column of the Table (Addition cash required). You can click the MAKE PAYMENT/POST CREDIT TO LEDGER button to pay off the liabilities.

Scenario 3: If available cash balance in Electronic cash ledger is more than the amount required to offset the liabilities, but due to ITC utilization principle, you cannot offset the liabilities
If available cash balance in Electronic cash ledger is more than the amount required to offset the liabilities, but due to ITC utilization principle, you cannot offset the liabilities. In that case, additional cash required for paying liability is being reflected in the last column of the Table (Addition cash required). You may create challan for that additional cash directly by clicking on the CREATE CHALLAN button.

17.1. Use the scroll bar to move to the right to view the additional cash required for paying liability.

18. Click the MAKE PAYMENT/POST CREDIT TO LEDGER button to pay off the liabilities or to claim credit in case of no liabilities.
Note:
In case, you want to make changes to any details in any of the sections in the previous page, you can go back to the previous page and make the changes after clicking the BACK button. Once you click the MAKE PAYMENT/POST CREDIT TO LEDGER button and pay off the liabilities, you cannot go back and make any changes to the Form GSTR-3B.
On click of MAKE PAYMENT/POST CREDIT TO LEDGER button, GST Portal will check the available Cash ledger balance.
Once you click the MAKE PAYMENT/POST CREDIT TO LEDGER button and pay off the liabilities, you cannot make any changes to the Form GSTR-3B.
You can click the PREVIEW DRAFT GSTR-3B button to view the summary page of Form GSTR-3B for your review. It is recommended that you download this Summary page and review the summary of entries made in different sections with patience before making payments.

Create Challan
19. In case of insufficient balance, “You do not have sufficient balance in Electronic Cash Ledger. Do you want to Create challan?" pop-up message is displayed. Click the YES button.

20. The Create Challan page is displayed.
Note: In the Tax Liability Details grid, the Total Challan Amount field and Total Challan Amount (In Words) fields are auto-populated with total amount of payment to be made. You cannot edit the amount.
21. Select the Payment Modes as E-Payment/ Over the Counter/ NEFT/RTGS. Click the GENERATE CHALLAN button. The Challan is generated.
Note:
- In case of Net Banking: You will be directed to the Net Banking page of the selected Bank. The payment amount is shown at the Bank’s website. If you want to change the amount, abort the transaction and create a new challan. In case of successful payment, you will be re-directed to the GST Portal where the transaction status will be displayed.
- In case of Over the Counter: Take a printout of the Challan and visit the selected Bank. Pay using Cash/ Cheque/ Demand Draft within the Challan’s validity period. Status of the payment will be updated on the GST Portal after confirmation from the Bank.
- In case of NEFT/ RTGS: Take a printout of the Challan and visit the selected Bank. Mandate form will be generated simultaneously. Pay using Cheque through your account with the selected Bank/ Branch. You can also pay using the account debit facility. The transaction will be processed by the Bank and RBI will confirm the same within <2 hours>. Status of the payment will be updated on the GST Portal after confirmation from the Bank.
Click here to refer the FAQs and User Manual on Making Payment.

22. Once the payment is done, a confirmation message is displayed. Click the YES button.

File GSTR-3B
23. Click the PROCEED TO FILE button.

23.1 You can provide liability breakup of previous periods by selecting it from the drop-down or add/remove additional periods by clicking on the edit buttons. Click SAVE to continue filing GSTR-3B.
This breakup will be used to compute the interest liability which will be auto-populated in tile 5.1 of the next period as Interest and Late fee for previous tax period.

24. Select the checkbox for declaration. From the Authorised Signatory drop-down list, select the authorized signatory. Click the FILE GSTR-3B WITH DSC or FILE GSTR-3B WITH EVC button.

24.1. FILE GSTR-3B WITH DSC:
a. Click the PROCEED button.

b. Select the certificate and click the SIGN button.
24.2. FILE GSTR-3B WITH EVC:
a. Enter the OTP sent on email and mobile number of the Authorized Signatory registered at the GST Portal and click the VERIFY button.

25. The success message is displayed. Click the OK button.

26. The status of Form GSTR-3B is changed to Filed.
Download Filed Return
27. Click the DOWNLOAD FILED GSTR-3B button to download the filed return.

The PDF file generated would now bear watermark of final Form GSTR-3B.
View Return Status
28. Click the Back button. The File Returns page is displayed. Select the Financial Year & Return Filing Period (Month) for which you want to view the return from the drop-down list. Click the SEARCH button.

29. Status of the Form GSTR-3B return changes to "Filed". You can click the VIEW GSRT3B button to view the Form GSTR-3B return.

Manual > Form GSTR-4 - Quarterly Return (Till FY 2018-19)
How can I create and file details in Form GSTR-4 - Quarterly Return (Till FY 2018-19)?
To create and file details in Form GSTR-4 - Quarterly Return (Till FY 2018-19), perform following steps:
Note: Quarterly Form GSTR-4 has been discontinued w.e.f. 1st April, 2019. This manual can be used for quarterly Form GSTR-4 to be filed for tax periods upto 31st March, 2019.
(I) In case, you want to file NIL return in Form GSTR-4 (Quarterly) , click here.
(II) In case, you want to file quarterly return in Form GSTR-4, perform following steps:
A. Login and Navigate to Form GSTR-4 page
B. Enter details in various tiles
E. File Form GSTR-4 with DSC/ EVC
F. View Debit entries in Electronic Cash Ledger for tax payment
A. Login and Navigate to Form GSTR-4 page
1. Access the www.gst.gov.in URL. The GST Home page is displayed.
2. Login to the GST Portal with valid credentials.
3. Click the Services > Returns > Returns Dashboard command.
Alternatively, you can also click the Returns Dashboard link on the Dashboard.

4. The File Returns page is displayed. Select the Financial Year & Return Filing Period (Quarter) for which you want to file the return from the drop-down list.
5. Click the SEARCH button.
6. The File Returns page is displayed. In the GSTR-4 tile, click the PREPARE ONLINE button if you want to prepare the return by making online entries on the GST Portal.
Note:
- Please read the important message in the box carefully.
- If you are Micro, Small or MSME and wish to submit your interest for availing Mudra Loan upto 10 Lacs or MSME Loan upto 5 Cr., you can click on the hyperlink of click here.

- Fill the consent form and click on the SUBMIT button to share the details with Department of Financial Services.
- Following Message will be displayed. Click on CLOSE button to go back to Returns dashboard.
7. A list of questions are displayed. You need to answer all the questions to show the relevant sections applicable to you.

8 (a) To file Nil return: Nil return can be filed by you if you have not made any outward supply (commonly known as sale) and have NOT received (commonly known as purchase) any goods/ services and do not have any tax liability etc.
8.1. Select Yes for option (i).
8.2. Click the NEXT button and follow steps 8.3 to 8.5 below to file Nil Form GSTR-4 for the financial year. .

8.3. Preview Draft GSTR-4
8.4. Proceed to File and Payment of Tax
8.5. File GSTR-4
8 (b) To file Quarterly return:
8.1. Click the NEXT button. Based on your answers, relevant tables of GSTR-4 will only be visible here. You may go back to previous screen by clicking on BACK button.

8.2. The GSTR-4 – Quarterly Return page is displayed.
Note:
Based on the selection made in previous page, applicable tiles will be visible to you for providing the details.
A question in which Yes, is selected can’t be made ‘No’ after clicking on ‘Next’ button. However, question on which ‘No’ is selected can be made as ‘Yes’ subsequently.

Click here to go back to the main menu
B. Enter details in various tiles
4A, 4B. Inward Supplies (Registered): To add details of inward supplies received from a registered supplier (with or without reverse charge)
4C. Inward supplies (Unregistered): To add details of inward supplies received from an unregistered supplier
4D. Import of Service: To add details of import of service
5A,5B. Amendment of Inward supplies (Registered): To add amendment details of inward supplies received from a registered supplier (with or without reverse charge)
5A. Amendment of Inward supplies (Unregistered): To add amendment details of inward supplies received from an unregistered supplier
5A. Amendment of Import of services: To add amendment details of import of service
5B. Debit/Credit Notes (Registered): To add details of credit or debit notes issued/ received to/from the registered recipients
5B. Debit/Credit Notes (Unregistered): To add details of credit or debit notes issued to the unregistered recipients
6. Tax on Outward Supplies: To add details of tax on outward supplies made (Net of advance and goods returned)
5C. Amendment Debit/Credit Notes (Registered): To add amendment details of credit or debit notes issued/received to/from the registered recipients
5C. Amendment Debit/Credit Notes (Unregistered): To add amendment details of credit or debit notes issued to the unregistered recipients
7. Amendment of Tax on Outward Supplies: To add amendment details of tax on outward supplies made (Net of advance and goods returned)
8A. Advance amount paid: To add details of advance amount paid for reverse charge supplies in the tax
8B. Adjustment of Advances paid: To add details of advance amount on which tax was paid in earlier period but invoice has been received in the current period
8A-II. Amendment of Tax Liability: To add details of amendment of advance amount paid for reverse charge supplies in the tax period
8B-II. Amendment of Adjustment of advances: To add amendment details of advance amount on which tax was paid in earlier period but invoice has been received in the current period
Click on the tile names to know more and enter related details:
4A, 4B. Inward Supplies (Registered)
9.1. To add details of inward supplies received from a registered supplier (with or without reverse charge), click the 4A, 4B. Inward Supplies (Registered) tile.

9.2. The B2B Invoices – Supplier-Wise-Summary page is displayed. Click the ADD DETAILS button.

9.3. The B2B – Add Invoice page is displayed.

9.4. In the Supplier GSTIN field, enter the GSTIN of the supplier.
9.5. In the Invoice No., Invoice Date and Total Invoice Value fields, enter the Invoice number, date of the invoice and value of the total invoice.
Note:
Once the GSTIN of the supplier is entered, Supplier Name and Supply Type fields are auto-populated based on the GSTIN of the supplier.
The auto-populated POS is editable. Depending on selected POS, the supply type gets auto-populated.
The screen will expand downwards and more fields will appear to enter line item details of the invoice.
9.6. Select the checkbox for Supply attract Reverse Charge, if supply attracts any reverse charge.
9.7. (a) In case of Intra-State transaction:
In case the POS (place of supply) of the goods/ services is the same State as that of the supplier, the transaction is an Intra-State transaction.
Notice, fields for Central Tax and State/UT Tax will appear.
a) In the Taxable Value field against the rates, enter the taxable value of the goods or services.
b) In the Cess field, enter the cess amount.
c) Click the SAVE button to save the invoice details.
Note: The Amount of Tax fields are auto-populated based on the values entered in Taxable Value fields respectively. The CESS field is not auto populated and has to be entered by the taxpayer.

9.7. (b) In case of Inter-State transaction:
In case, the Place of Supply (POS) is different from the State of the supplier, transaction becomes an Inter-State transaction.
Fields for Integrated Tax will appear.
a) In the Taxable Value field against the rates, enter the taxable value of the goods or services.
b) In the Cess field, enter the cess amount.
c) Click the SAVE button to save the invoice details.
Note: The Amount of Tax fields are auto-populated based on the values entered in Taxable Value and tax rate fields respectively. The CESS field is not auto populated and has to be entered by the taxpayer.

9.8. You will be directed to the previous page and a message is displayed that Request accepted successfully. Here, you can also edit/delete the added invoices (under Actions). Click the BACK button to go back to the GSTR-4 page.

9.9. You will be directed to the GSTR-4 landing page and the 4A, 4B. Inward Supplies (Registered) tile in GSTR-4 will reflect the number of invoices added along with Total Invoice value, Total taxable value, total tax liability and total tax amount entered.

Similarly, you can add more details of inward supplies received from a registered supplier (with or without reverse charge).

Click here to go back to the main menu
4C. Inward supplies (Unregistered)
9.1. To add details of inward supplies received from an unregistered supplier, click the 4C. Inward supplies (Unregistered) tile.

9.2. The 4C. Inward supplies received from an unregistered supplier page is displayed. Click the ADD DETAILS button.

9.3. The B2B Unregistered Supplier – Add Invoice page is displayed.

9.4. In the Invoice No., Invoice Date and Total Invoice Value fields, enter the Invoice number, date of the invoice and value of the total invoice.
9.5. Select the POS from the drop-down list.
9.6. Select the Supply Type from the drop-down list.
9.7. (a) In case of Intra-State transaction:
In case supply type is an Intra-State transaction, fields for Central Tax and State/UT Tax will appear.
a) In the Taxable Value field against the rates, enter the taxable value of the goods or services.
b) In the Cess field, enter the cess amount.
c) Click the SAVE button to save the invoice details.
Note: The Amount of Tax fields are auto-populated based on the values entered in Taxable Value fields respectively. The CESS field is not auto populated and has to be entered by the taxpayer.

9.7. (b) In case of Inter-State transaction:
In case supply type is an Inter-State transaction, fields for Integrated Tax will appear.
Fields for Integrated Tax will appear.
a) In the Taxable Value field against the rates, enter the taxable value of the goods or services.
b) In the Cess field, enter the cess amount.
c) Click the SAVE button to save the invoice details.
Note: The Amount of Tax fields are auto-populated based on the values entered in Taxable Value and tax rate fields respectively. The CESS field is not auto populated and has to be entered by the taxpayer.

9.8. You will be directed to the previous page and a message is displayed that Request accepted successfully.
Here, you can also edit/delete the added invoices (under Actions). Click the BACK button to go back to the GSTR-4 page.

9.9. You will be directed to the GSTR-4 landing page and the 4C. Inward supplies (Unregistered) tile in GSTR-4 will reflect the number of invoices added along with Total Invoice value, Total taxable value and total tax liability.

Similarly, you can add more details of inward supplies received from an unregistered supplier (with or without reverse charge).

Click here to go back to the main menu
4D. Import of Service
9.1. To add details of import of service, click the 4D. Import of Service tile.

9.2. The 4D. Import of Service page is displayed. Click the ADD DETAILS button.

9.3. The Import of Services – Add page is displayed.

9.4. In the Invoice No., Invoice Date and Total Invoice Value fields, enter the Invoice number, date of the invoice and value of the total invoice.
9.5. Select the POS from the drop-down list.
9.6. In the Taxable Value field against the rates, enter the taxable value of the goods or services.
9.7. In the Cess field, enter the cess amount.
9.8. Click the SAVE button to save the invoice details.

9.9. You will be directed to the previous page and a message is displayed that Request accepted successfully.
Here, you can also edit/delete the added invoices (under Actions). Click the BACK button to go back to the GSTR-4 page.

9.10. You will be directed to the GSTR-4 landing page and the 4D. Import of Service tile in GSTR-4 will reflect the number of invoices added along with Total Invoice value, Total taxable value and total tax liability.

Similarly, you can add more details of import of services.

Click here to go back to the main menu
5A, 5B. Amendment of Inward supplies (Registered)
9.1. To add amendment details of inward supplies received from a registered supplier (with or without reverse charge), click the 5A, 5B. Amendment of Inward supplies (Registered) tile.

9.2. The Amendment of B2B (Registered) - Summary page is displayed.

9.3. Select the Financial Year from the drop-down list.
9.4. In the Invoice No. field, enter the invoice number which you want to amend from earlier tax period.
9.5. Click the AMEND INVOICE button.

9.6. The Amendment of B2B (Registered) - Summary page is displayed.

9.7. In the Revised Invoice No. field, enter the revised invoice number for the previous invoice.
9.8. Select the Revised Date using the calendar. Make amendments to the details like Revised Invoice No., Revised Invoice Date, Total Invoice Value, Taxable Value etc. as required.
Note: Select the checkbox for Supply attract Reverse Charge, if supply attracts any reverse charge.
9.9. Click the SAVE button.

9.10. You will be directed to the previous page. Here, you can also edit/delete the added invoices (under Actions).
9.11. Click the BACK button to go back to the GSTR-4 page.

9.12. You will be directed to the GSTR-4 landing page and the 5A, 5B. Amendment of Inward supplies (Registered) tile in GSTR-4 will reflect the number of such invoices amended along with Total Invoice value, Total Taxable Value and Total Tax Liability.

Similarly, you can add amendment details of inward supplies received from a registered supplier (with or without reverse charge).

Click here to go back to the main menu
5A. Amendment of Inward supplies (Unregistered)
9.1. To add amendment details of inward supplies received from an unregistered supplier, click the 5A. Amendment of Inward supplies (Unregistered) tile.

9.2. The Amendment of Inward supplies (Unregistered) page is displayed.

9.3. Select the Financial Year from the drop-down list.
9.4. In the Original Invoice Number field, enter the invoice number which you want to amend from earlier tax period.
9.5. Click the AMEND INVOICE button.

9.6. The Amendment of Inward supplies (Unregistered) page is displayed.

9.7. In the Revised Invoice No. field, enter the revised invoice number for the previous invoice.
9.8. Select the Revised Date using the calendar. Make amendments to the details like Revised Invoice No., Revised Invoice Date, Total Invoice Value, Taxable Value etc. as required.
9.9. Click the SAVE button.

9.10. You will be directed to the previous page. Here, you can also edit/delete the amended invoices (under Actions).
9.11. Click the BACK button.

9.12. You will be directed to the GSTR-4 landing page and the 5A. Amendment of Inward supplies (Unregistered) tile in GSTR-4 will reflect the number of such invoices amended along with Total Invoice Value, Total Taxable value and Total Tax Liability.

Click here to go back to the main menu
5A. Amendment of Import of services
9.1. To add amendment details of import of services of supplier, click the 5A. Amendment of Import of services tile.

9.2. The Amendment of Import of Services - Summary page is displayed.

9.3. Select the Financial Year from the drop-down list.
9.4. In the Original Invoice Number field, enter the invoice number which you want to amend from earlier tax period.
9.5. Click the AMEND INVOICE button.

9.6. The Amendment of Import of Services - ADD page is displayed.

9.7. In the Revised Invoice No. field, enter the revised invoice number for the previous invoice.
9.8. Select the Revised Date using the calendar. Make amendments to the details like Revised Invoice No., Revised Invoice Date, Total Invoice Value, Taxable Value etc. as required.
9.9. Click the SAVE button.

9.10. You will be directed to the previous page. Here, you can also edit/delete the amended invoices (under Actions).
9.11. Click the BACK button.

9.12. You will be directed to the GSTR-4 landing page and the 5A. Amendment of Import of services tile in GSTR-4 will reflect the number of such invoices amended along with Total Invoice Value, Total Taxable value and Total Tax Liability.

Click here to go back to the main menu
5B. Debit/Credit Notes (Registered)
9.1 To add details of credit or debit notes issued to the registered recipients, click the 5B. Debit/Credit Notes (Registered) tile.

9.2. The Credit/Debit Notes (Registered)- Summary page is displayed. Click the ADD DETAILS button.

9.3. The Credit/Debit Notes (Registered) - Add Note page is displayed.

9.4. In the Supplier GSTIN field, enter the GSTIN of the supplier. Once the GSTIN of the supplier is entered, Supplier Name field is auto-populated based on the GSTIN of the supplier.
9.5. In the Debit/Credit Note No., Debit/Credit Note Date, Note Value and Note Type fields, enter the number, date, value and type of the Debit/Credit Note.
9.6. In the Original Invoice Number and Original Invoice Date, enter the original invoice number and date.
9.7. Select the Supply Type from the drop-down list.

9.8 (a) In case of Intra-State transaction:
In case, the supply type is Intra-State, fields for Central Tax and State/UT Tax will appear.
a) In the Taxable Value field against the rates, enter the taxable value of the goods or services.
b) In the Cess field, enter the cess amount.
c) Click the SAVE button to save the invoice details.
Note: The Amount of Tax fields are auto-populated based on the values entered in Taxable Value and tax rate fields respectively. The CESS field is not auto populated and has to be entered by the taxpayer.

9.8 (b) In case of Inter-State transaction:
In case, the supply type is Inter-State, field for Integrated Tax will appear.
a) In the Taxable Value field against the rates, enter the taxable value of the goods or services.
b) In the Cess field, enter the cess amount.
c) Click the SAVE button to save the invoice details.
Note: The Amount of Tax fields are auto-populated based on the values entered in Taxable Value and tax rate fields respectively. The CESS field is not auto populated and has to be entered by the taxpayer.

9.9. You will be directed to the previous page and a message is displayed that Request accepted successfully. Here, you can also edit/delete the added invoices (under Actions).
9.10. Click the BACK button to go back to the GSTR-4 page.

9.11. You will be directed to the GSTR-4 landing page and the 5B. Debit/Credit Notes (Registered) tile in GSTR-4 will reflect the number of invoices added along with Total note value, Total taxable value and total tax liability.
Note: The summary displayed for amendments table can have negative values, in case of downward amendment, as the values displayed are net of (Amended values - Original value).

Click here to go back to the main menu
5B. Debit/Credit Notes (Unregistered)
9.1. To add details of credit or debit notes issued to the unregistered recipients, click the 5B. Debit/Credit Notes (Unregistered) tile.

9.2. The Credit/Debit Notes (Unregistered)- Summary page is displayed. Click the ADD DETAILS button.

9.3. The Credit/Debit Notes (Unregistered) - Add Note page is displayed.

9.4. Select the Type from the drop-down list.

9.5. In the Debit/Credit Note No., Debit/Credit Note Date, Note Value and Note Type fields, enter the number, date, value and type of the Debit/Credit Note.

9.6. In the Original Invoice Number and Original Invoice Date, enter the original invoice number and date.
9.7. Select the Supply Type from the drop-down list.
9.8 (a) In case of Intra-State transaction:
In case, the supply type is Intra-State, fields for Central Tax and State/UT Tax will appear.
a) In the Taxable Value field against the rates, enter the taxable value of the goods or services.
b) In the Cess field, enter the cess amount.
c) Click the SAVE button to save the invoice details.
Note: The Amount of Tax fields are auto-populated based on the values entered in Taxable Value and tax rate fields respectively. The CESS field is not auto populated and has to be entered by the taxpayer.

9.8 (b) In case of Inter-State transaction:
In case, the supply type is Inter-State, field for Integrated Tax will appear.
a) In the Taxable Value field against the rates, enter the taxable value of the goods or services.
b) In the Cess field, enter the cess amount.
c) Click the SAVE button to save the invoice details.
Note: The Amount of Tax fields are auto-populated based on the values entered in Taxable Value and tax rate fields respectively. The CESS field is not auto populated and has to be entered by the taxpayer.

9.9. You will be directed to the previous page and a message is displayed that Request accepted successfully. Here, you can also edit/delete the added invoices (under Actions).
9.10. Click the BACK button to go back to the GSTR-4 page.

9.11. You will be directed to the GSTR-4 landing page and the 5B. Debit/Credit Notes (Unregistered) tile in GSTR-4 will reflect the number of invoices added along with Total note value, Total taxable value and total tax liability.

Click here to go back to the main menu
6. Tax on Outward Supplies
9.1. To add details of tax on outward supplies made (Net of advance and goods returned), click the 6. Tax on Outward Supplies tile.

9.2. The Tax on Outward Supplies made (net of advance and goods returned) page is displayed.

9.3. Enter the turnover details against rate of tax for composition tax amount.
9.4. Click the SAVE button.

9.5. A message is displayed that Request accepted successfully. Click the BACK button to go back to the GSTR-4 page.

9.6. You will be directed to the GSTR-4 landing page and the 6. Tax on Outward Supplies tile in GSTR-4 will reflect the number of invoices added along with Total value, Total taxable value and total tax liability.

Click here to go back to the main menu
5C. Amendment Debit/Credit Notes (Registered)
9.1. To add amendment details of credit or debit notes issued to the registered recipients, click the 5C. Amendment Debit/Credit Notes (Registered) tile.

9.2. The Amended Credit/ Debit Notes - Summary page is displayed.

9.3. Select the Financial Year from the drop-down list.
9.4. In the Supplier GSTIN field, enter the GSTIN of the supplier.
9.5. In the Original Note No. field, enter the original note number which you want to amend from earlier tax period.
9.6. Click the AMEND NOTE button.

9.7. The Amended Credit/Debit Notes - Add Note page is displayed.

9.8. In the Revised Credit/Debit Note No. field, enter the revised credit or debit note number.
9.9. Select the Revised Credit/Debit Note Date using the calendar. Make amendments to the details as required.
9.10. Click the SAVE button.

9.11. You will be directed to the previous page. Here, you can also edit/delete the amended invoices (under Actions).
9.12. Click the BACK button.

9.13. You will be directed to the GSTR-4 landing page and the 5C. Amendment Debit/Credit Notes (Registered) tile in GSTR-4 will reflect the number of such invoices amended along with Total Invoice Value, Total Taxable value and Total Tax Liability.

Click here to go back to the main menu
5C. Amendment Debit/Credit Notes (Unregistered)
9.1. To add amendment details of credit or debit notes issued to the unregistered recipients, click the 5C. Amendment Debit/Credit Notes (Unregistered) tile.

9.2. The Amended Credit/ Debit Notes (Unregistered) - Summary page is displayed.

9.3. Select the Financial Year from the drop-down list.
9.4. In the Original Note No. field, enter the original note number which you want to amend from earlier tax period.
9.5. Click the AMEND NOTE button.

9.6. The Amended Credit/Debit Notes - Details page is displayed.

9.7. In the Revised Credit/Debit Note No. field, enter the revised credit or debit note number.
9.8. Select the Revised Credit/Debit Note Date using the calendar. Make amendments to the details as required.
9.9. Click the SAVE button.

9.10. You will be directed to the previous page. Here, you can also edit/delete the amended invoices (under Actions).
9.11. Click the BACK button.

9.12. You will be directed to the GSTR-4 landing page and the 5C. Amendment Debit/Credit Notes (Unregistered) tile in GSTR-4 will reflect the number of such invoices amended along with Total Invoice Value, Total Taxable value and Total Tax Liability.

Click here to go back to the main menu
7. Amendment of Tax on Outward Supplies
9.1. To add amendment details of tax on outward supplies made (Net of advance and goods returned), click the 7. Amendment of Tax on Outward Supplies tile.

9.2. The Amendment of tax on Outward Supplies page is displayed.

9.3. Select the Financial Year and Return Filing Period from the drop-down list.
9.4. Click the AMEND INVOICE button.

9.5. The Amendment of Tax on Outward Supplies page is displayed.

9.6. Enter the turnover details against rate of tax for composition tax amount.
9.7. Click the SAVE button.

9.8. You will be directed to the previous page. Here, you can also edit/delete the added invoices (under Actions). Click the BACK button to go back to the GSTR-4 page.

9.9. You will be directed to the GSTR-4 landing page and the 7. Amendment of Tax on Outward Supplies tile in GSTR-4 will reflect the number of invoices added along with Total value, Total taxable value and total tax liability.

Click here to go back to the main menu
8A. Advance amount paid
9.1. To add details of advance amount paid for reverse charge supplies in the tax, click the 8A. Advance amount paid tile.

9.2. The Tax Liability (Advance Received)-Summary page is displayed. Click the ADD STATE WISE DETAILS button.

9.3. The Tax Liability (Advance Received) – Add Details page is displayed.

9.4. Select the POS from the drop-down list. Depending on selected POS, the supply type gets auto-populated.

9.5. (a) In case of Intra-State transaction:
Notice, fields for Central Tax and State/UT Tax will appear.
a) In the Gross Advance paid field against the rates, enter the gross advance paid.
b) In the Cess field, enter the cess amount.
c) Click the SAVE button to save the details.
Note: The Amount of Tax fields are auto-populated based on the values entered in Taxable Value fields respectively. The CESS field is not auto populated and has to be entered by the taxpayer.

9.5. (b) In case of Inter-State transaction:
Notice, fields for Integrated Tax will appear.
a) In the Gross Advance paid field against the rates, enter the gross advance paid.
b) In the Cess field, enter the cess amount.
c) Click the SAVE button to save the details.
Note: The Amount of Tax fields are auto-populated based on the values entered in Taxable Value and tax rate fields respectively. The CESS field is not auto populated and has to be entered by the taxpayer.

9.6. You will be directed to the previous page and a message is displayed that Request accepted successfully. Here, you can also edit/delete the added invoices (under Actions). Click the BACK button to go back to the GSTR-4 page.

9.7. You will be directed to the GSTR-4 landing page and the 8A. Advance amount paid tile in GSTR-4 will reflect the number of gross advance paid and total tax liability.

Click here to go back to the main menu
8B. Adjustment of Advances paid
9.1. To add details of advance amount on which tax was paid in earlier period, but invoice has been received in the current period, click the 8B. Adjustment of Advances paid tile.

9.2. The Adjustment of Advances-Summary page is displayed. Click the ADD STATE WISE DETAILS button.

9.3. The Tax already paid on invoices issued in the current period – Add Details page is displayed.

9.4. Select the POS from the drop-down list. Depending on selected POS, the supply type gets auto-populated.

9.5. (a) In case of Intra-State transaction:
Notice, fields for Central Tax and State/UT Tax will appear.
a) In the Gross Advance paid field against the rates, enter the gross advance paid.
b) In the Cess field, enter the cess amount.
c) Click the SAVE button to save the details.
Note: The Amount of Tax fields are auto-populated based on the values entered in Taxable Value fields respectively. The CESS field is not auto populated and has to be entered by the taxpayer.

9.5. (b) In case of Inter-State transaction:
Notice, fields for Integrated Tax will appear.
a) In the Gross Advance paid field against the rates, enter the gross advance paid.
b) In the Cess field, enter the cess amount.
c) Click the SAVE button to save the details.
Note: The Amount of Tax fields are auto-populated based on the values entered in Taxable Value and tax rate fields respectively. The CESS field is not auto populated and has to be entered by the taxpayer.

9.6. You will be directed to the previous page and a message is displayed that Request accepted successfully. Here, you can also edit/delete the added invoices (under Actions). Click the BACK button to go back to the GSTR-4 page.

9.7. You will be directed to the GSTR-4 landing page and the 8B. Adjustment of Advances paid tile in GSTR-4 will reflect the number of gross amount adjusted and total tax liability.

Click here to go back to the main menu
8A-II. Amendment of Tax Liability
9.1. To add details of amendment of advance amount paid for reverse charge supplies in the previous tax period, click the 8A-II. Amendment of Tax Liability tile.

9.2. The Amendment Tax Liability (Advance Received) - Summary page is displayed.

9.3. Select the Financial Year and Return Filing Period from the drop-down list.
9.4. Select the POS and Supply Type from the drop-down list.
9.5. Click the AMEND INVOICE button.

9.6. The Tax Liability (Advance Received) - Amend Details page is displayed.

9.7. Amend the Gross Advance Paid details against the rate.
9.8. Click the SAVE button.

9.9. You will be directed to the previous page. Here, you can also edit/delete the added invoices (under Actions).
9.10. Click the BACK button to go back to the GSTR-4 page.

9.11. You will be directed to the GSTR-4 landing page and the 8A-II. Amendment of Tax Liability tile in GSTR-4 will reflect the number of invoices added along with Gross amount adjusted and Total tax liability.

Click here to go back to the main menu
8B-II. Amendment of Adjustment of advances
9.1. To add amendment details of advance amount on which tax was paid in earlier period, but invoice has been received in the current period, click the 8B-II. Amendment of Adjustment of advances tile.

9.2. The Amendment of Adjustment of advances - Summary page is displayed.

9.3. Select the Financial Year and Return Filing Period from the drop-down list.
9.4. Select the POS and Supply Type from the drop-down list.
9.5. Click the AMEND INVOICE button.

9.6. The Amendment of Adjustment of advances - Edit Details page is displayed.

9.7. Enter the Gross Advance Paid details against the rate.
9.8. Click the SAVE button.

9.9. You will be directed to the previous page. Here, you can also edit/delete the added invoices (under Actions).
9.10. Click the BACK button to go back to the GSTR-4 page.

9.11. You will be directed to the GSTR-4 landing page and the 8B-II. Amendment of Adjustment of Advances tile in GSTR-4 will reflect the number of invoices added along with Gross Advance adjusted and Total tax liability.

Click here to go back to the main menu
C. Preview GSTR-4
10. Once you have entered details, click the PREVIEW button. This button will download the draft Summary page of your Form GSTR-4 for your review. It is recommended that you download this Summary page and review the summary of entries made in different sections before filing Form GSTR-4.

11. The PDF file is generated with watermark of draft as the details are yet to be submitted.

Click here to go back to the main menu
D. Proceed to File and Payment of Tax
12. Click the PROCEED TO FILE button.

13. A message is displayed on top page of the screen that Proceed to file request has been received. Please check the status in sometime. Click the Refresh button.

14. Once the status of Form GSTR-4 is "Ready to File", 10 & 11 - Tax, Interest, Late fee payable and paid tile gets enabled. Click the 10 & 11 - Tax, Interest, Late fee payable and paid tile.

15. The Payment of Tax page is displayed. Go through the instructions as shown at the top of the page.

16.1. The cash ledger balance as available on date is shown in below table.
.png)
16.2 (a). Scenario 1: If available balance in Electronic Cash Ledger is less than the amount required to offset the liabilities
i. If available balance in Electronic Cash Ledger is less than the amount required to offset the liabilities, then a part payment of liability can be made from available balance of the Electronic Cash Ledger. Additional cash required to be paid by taxpayer is shown in the "Tax to be paid, Interest to be paid and Late Fee to be paid" column.
You may directly create challan for payment of remaining part of liability, by clicking on the CREATE CHALLAN button.

ii. The Create Challan page is displayed.
Note: In the Tax Payment grid, the Total Challan Amount field and Total Challan Amount (In Words) fields are auto-populated with amount of remaining part of liability (for which payment is to be made). You cannot edit the amount shown in challan.
iii. Select the Payment Modes as E-Payment/ Over the Counter/ NEFT/RTGS.
iv. Click the GENERATE CHALLAN button.

v. The Challan is generated.

Note:
In case of Net Banking: You will be directed to the Net Banking page of the selected Bank. The payment amount is shown at the Bank’s website. If you want to change the amount, abort the transaction and create a new challan.
In case of successful payment, you will be re-directed to the GST Portal where the transaction status will be displayed.
In case of Over the Counter:
Take a print out of the Challan and visit the selected Bank. Pay using Cash/ Cheque/ Demand Draft within the Challan’s validity period. Status of the payment will be updated on the GST Portal after confirmation from the Bank.
In case of NEFT/ RTGS:
Take a print out of the Challan and visit the selected Bank. Mandate form will be generated simultaneously. Pay using Cheque through your account with the selected Bank/ Branch. You can also pay using the account debit facility. The transaction will be processed by the Bank and RBI shall confirm the same within <2 hours>. Status of the payment will be updated on the GST Portal after confirmation from the Bank.
Click here to refer the FAQs and User Manual on Making Payment.
16.2 (b). Scenario 2: If available balance in Electronic Cash Ledger is more than/equal to the amount required to offset the liabilities
i. If available balance in Electronic Cash Ledger is more than/equal to the amount required to offset the liabilities, no additional cash payment is required for paying liability.

17. Click the PREVIEW GSTR-4 button to view the summary page of Form GSTR-4 for your review. It is recommended that you download this Summary page and review the summary of entries made in different sections carefully before proceeding further.
.png)
18. The summary page of Form GSTR-4 is displayed.

Click here to go back to the main menu
E. File Form GSTR-4 with DSC/ EVC
19. Select the Declaration checkbox.
20. Select the Authorized Signatory from the drop-down list.
21. Click the FILE GSTR-4 button.
.png)
22. The Submit Application page is displayed. Click the FILE WITH DSC or FILE WITH EVC button.

23.1. FILE WITH DSC:
a. Select the certificate and click the SIGN button.
23.2. FILE WITH EVC:
a. Enter the OTP sent on email and mobile number of the Authorized Signatory registered at the GST Portal and click the VALIDATE OTP button.

24. The success message is displayed and ARN is displayed. Status of the Form GSTR-4 return changes to "Filed". Click the BACK button.

Note: After Form GSTR-4 is filed:
ARN is generated on successful filing of the Form GSTR-4 Return.
An SMS and an email are sent to the taxpayer on his registered mobile and email id.
Click here to go back to the main menu
F. View Debit entries in Electronic Cash Ledger for tax payment
25. Click the Debit entries in cash ledger for tax/interest payment tile.

26. The entries in Electronic Cash Ledger for tax payment is displayed. Click the BACK button.

26. Click the PREVIEW button to view the summary in PDF format.

27. The summary is displayed in PDF format.

Click here to go back to the main menu
Manual > Track Return Status
I am a taxpayer. How can I track return status that I have submitted after logging to the GST Portal?
On submission of the return, you will be given an Application Reference Number (ARN). You can track status of your application by tracking this ARN. To track return status, perform the following steps:
1. Access the https://www.gst.gov.in/ URL. The GST Home page is displayed.
2. Login to the GST Portal with valid credentials.
3. Click the Services > Returns> Track Return Status command.

In Case of ARN:
a) In the ARN field, enter the ARN received on your e-mail address when you submitted the return.
b) Click the SEARCH button.
The Application status is displayed.

In Case of Return Filing Period:
a) Select the Submission Period of the return using the calendar.
b) Click the SEARCH button.
The Application status is displayed.

In Case of Status:
a) Select the Status of the return from the drop-down list.
b) Click the SEARCH button.
The Application status is displayed.

To view the various Return status types refer the FAQs available at -> https://tutorial.gst.gov.in/userguide/returns/index.htm

Comments
Post a Comment